How I designed and built a four-metre album art gallery wall
A year and a half in the making: 50 album covers, custom framing, and a four-metre gallery wall built from scratch. Here's how the whole thing came together.
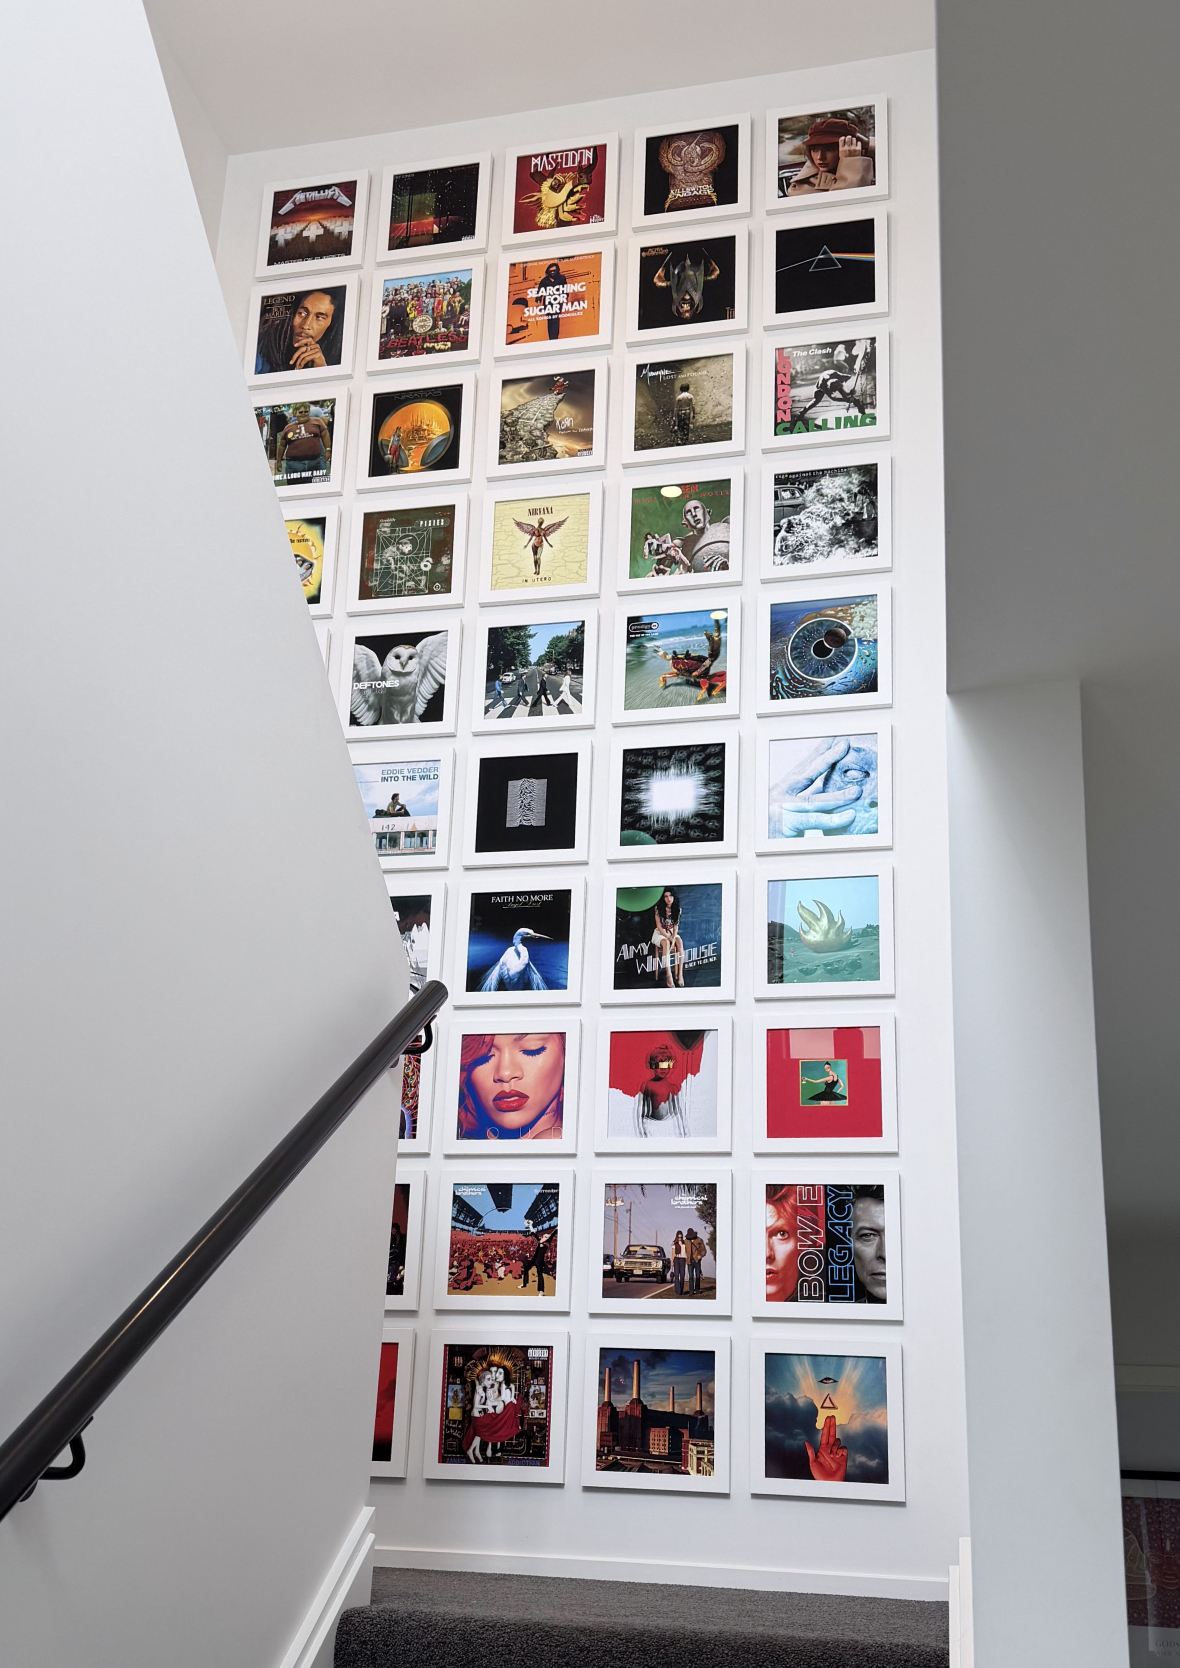
Standing at the bottom of the stairwell looking up at four metres of album covers on a gallery wall, it’s hard to explain how satisfying this feels. What started as a simple idea became one of the biggest and most rewarding projects we’ve tackled in the house. What surprised me most was that it ended up looking better than the version I’d been carrying around in my head for over a year. Usually there are compromises along the way. In this case, the finished wall somehow exceeded the original idea.
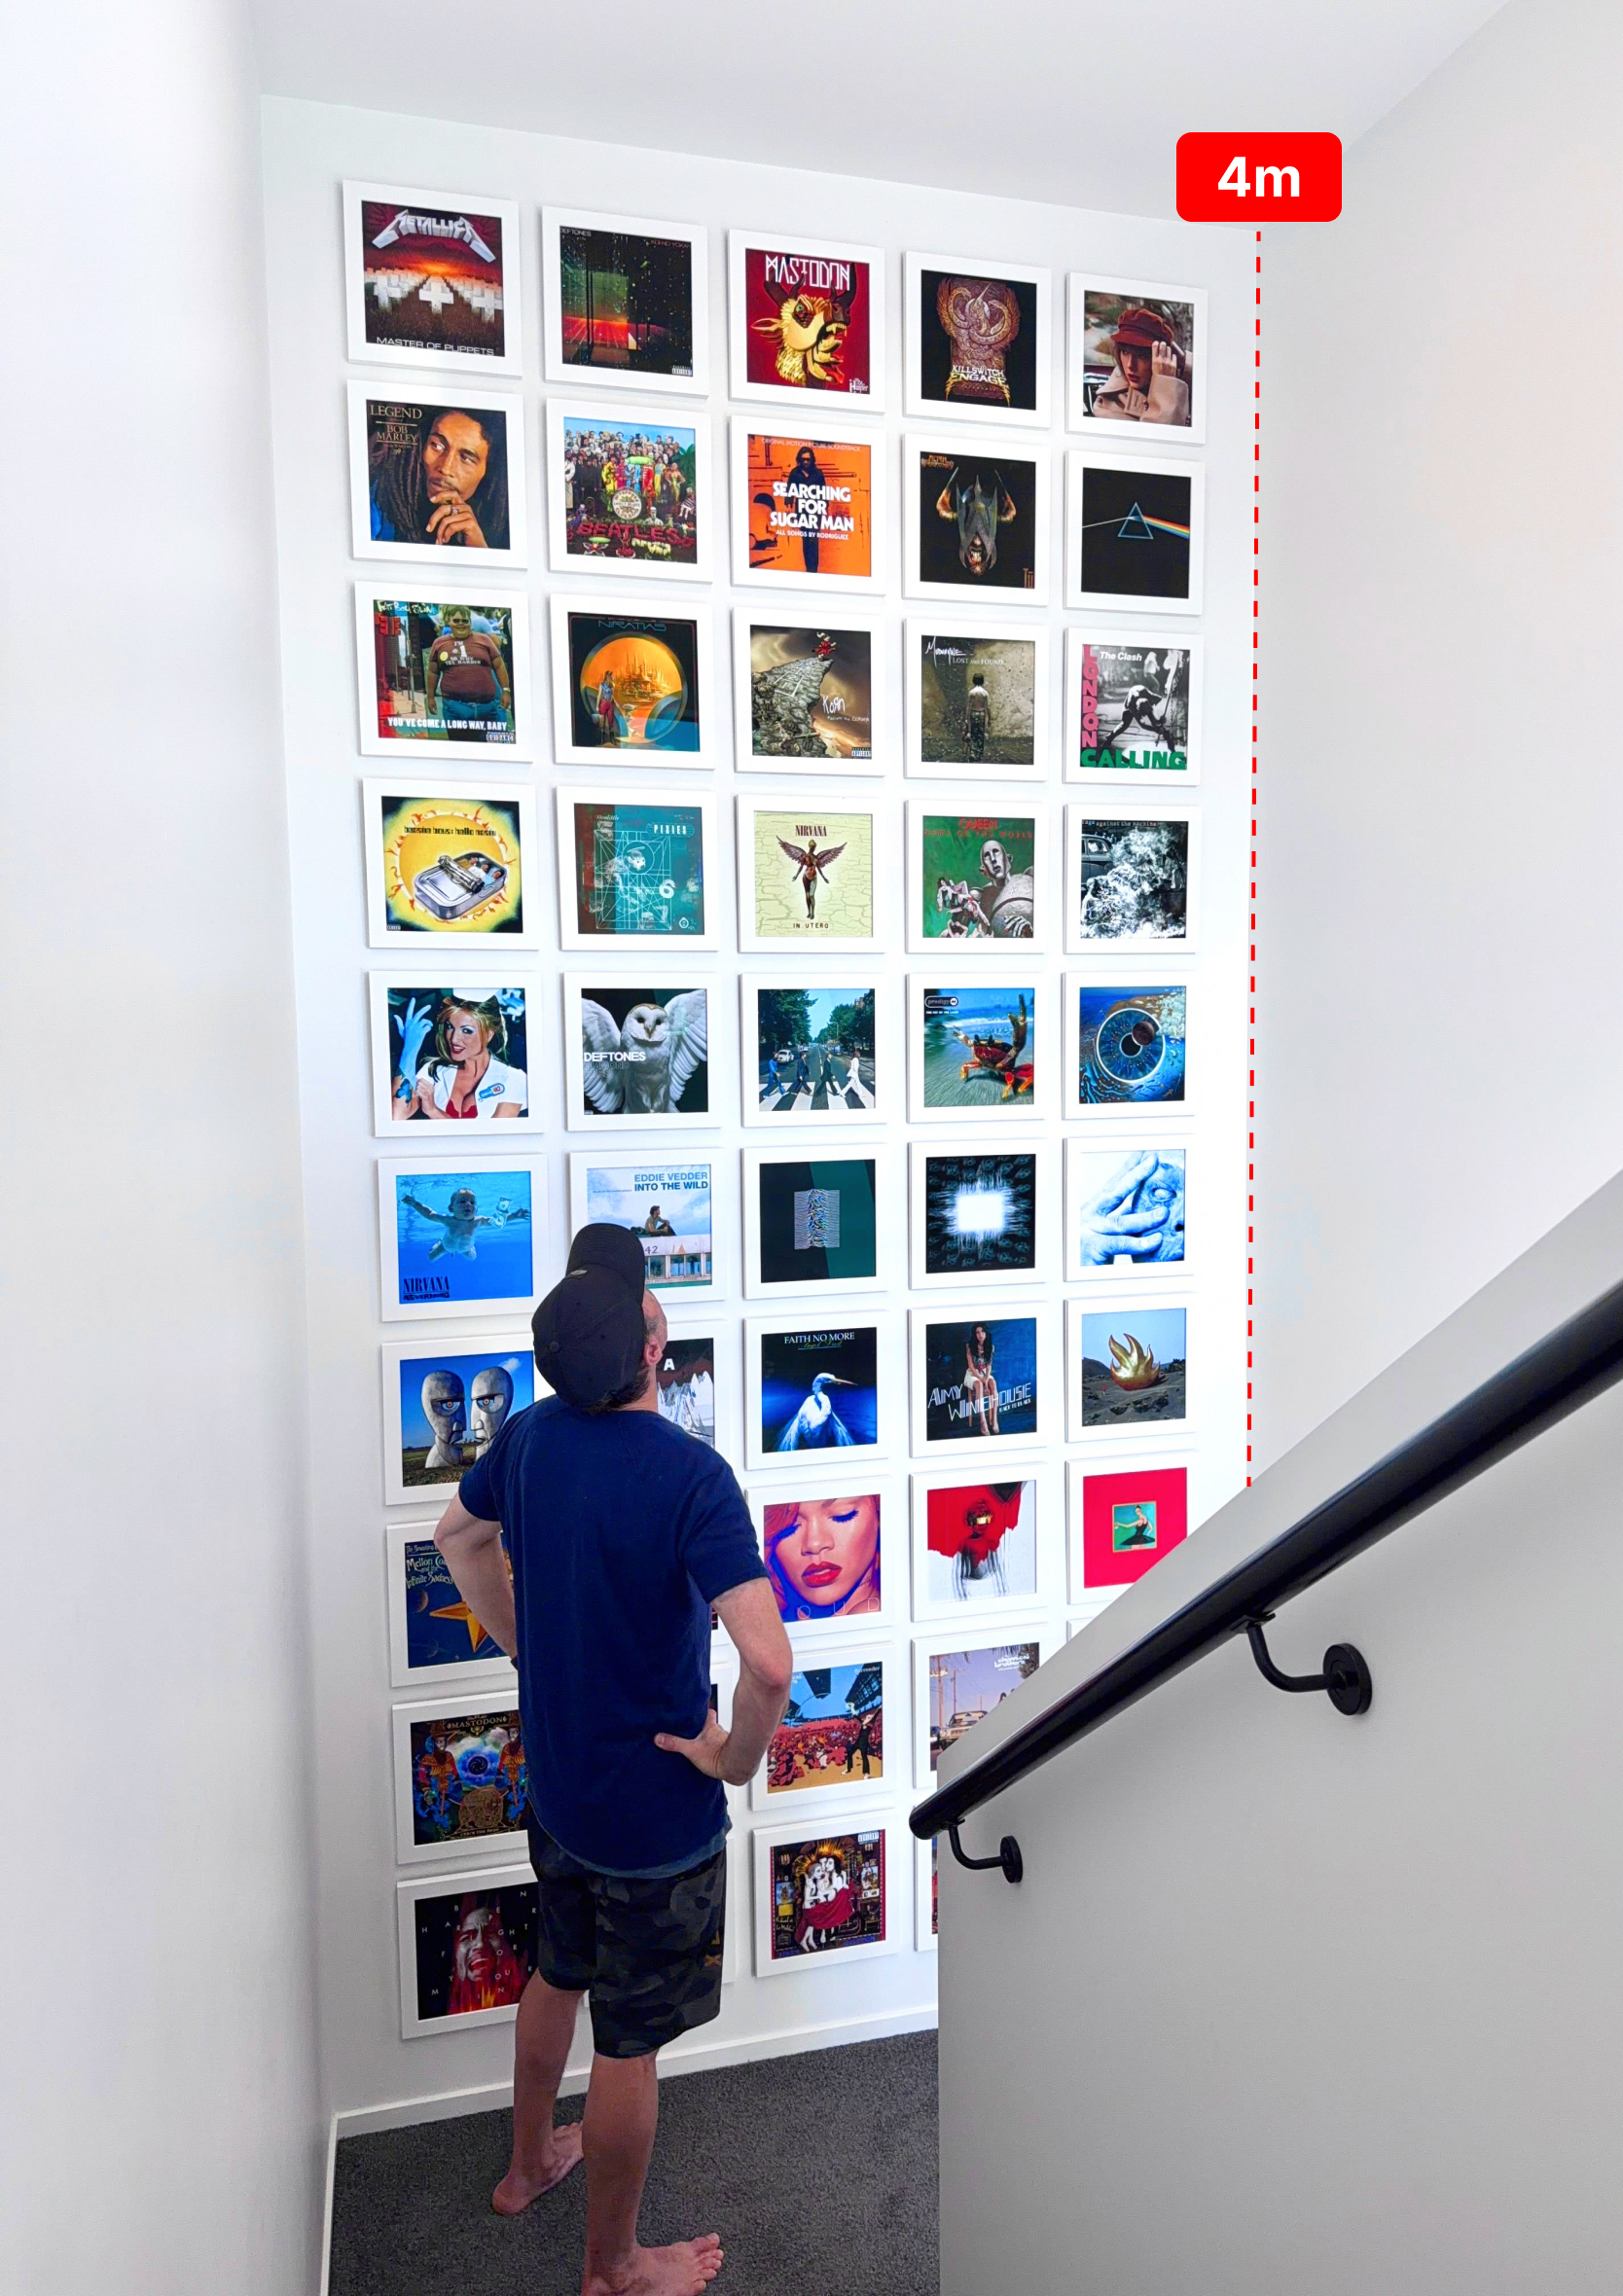
The whole process took about a year and a half. The first frame was ordered on 20 November 2024. The last frame was hung on 15 March 2026. From the landing to the ceiling is about 4m (13ft), and from the top of the wall to the ground floor is roughly 5.5m (18ft).
Gravity and I don’t tend to see eye to eye, so I was pretty stoked to finally see it all come together. 😍
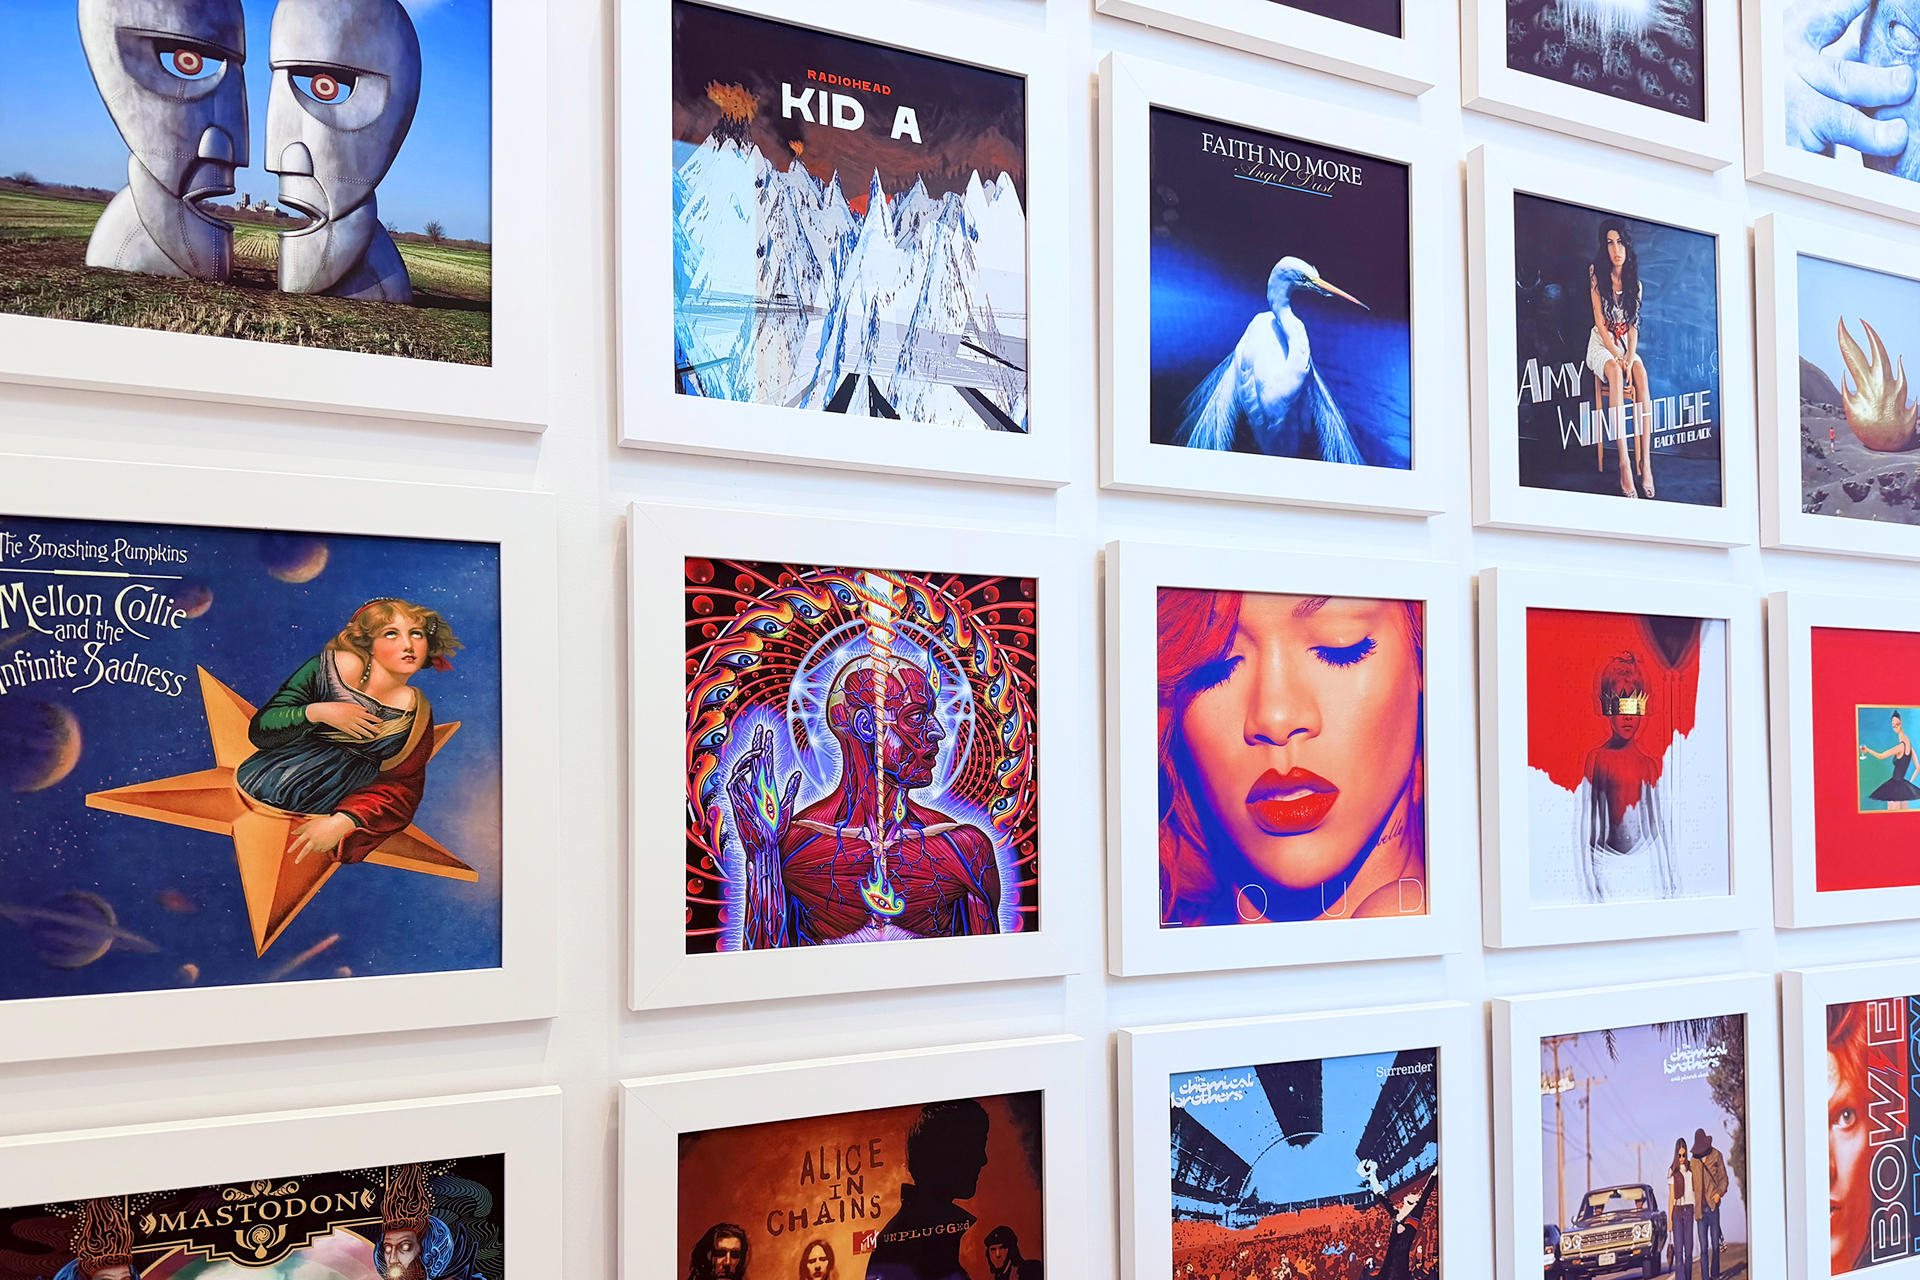
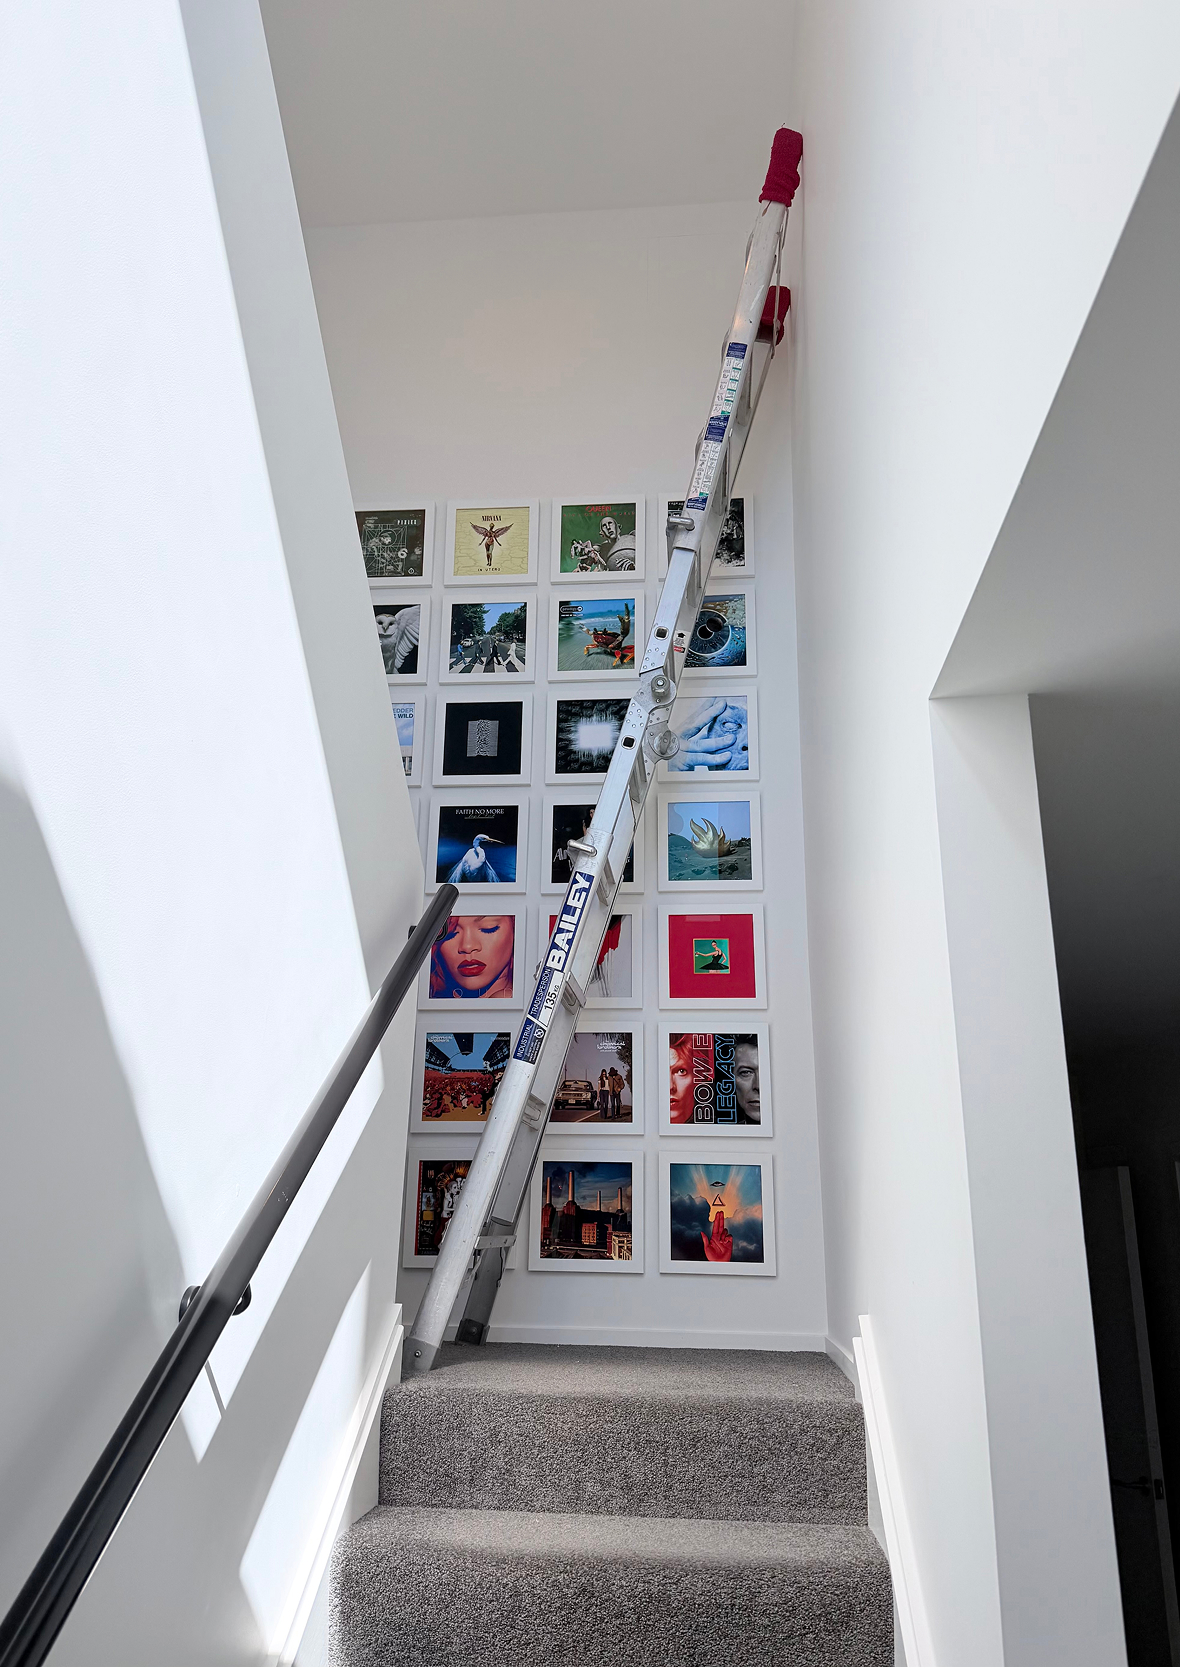
Four metres of album artwork, from the landing to the ceiling.Let’s just say this wasn’t my first time working at height.
Setting the selection criteria
Before we selected a single album, we agreed on a few ground rules. Every cover needed to earn its place on the wall. It had to be visually interesting, work as part of a larger collection, tell a story, and survive the toughest test of all: both my wife and I had to agree on it.
There were plenty of “what about this awesome album?” moments where great covers simply didn’t work alongside the others and didn’t make the final cut. You can see some of those honourable mentions in the companion article, link at the bottom. This was an awesome part of the process and meant rediscovering albums I hadn’t listened to in years, or had overlooked when they were first released. Some real hidden gems and rabbit holes to lose yourself in.
Beautifully designed
Well designed or visually interesting, whether through graphic design, photography, illustration or sculpture.
Puzzle pieces
Work well individually and as part of the overall collection.
Visual story telling
Tell a story, evoke an emotion, or remind you of a particular time and place.
Partnership
Be something both my wife and I agreed on.
Why a gallery wall made sense
We purposely went with muted colours throughout the house with the intention of introducing colour through artwork, photography and sculpture. This gave us much more flexibility, as we weren’t constantly competing with a dominant colour palette that could paint us into a corner.
Green curtains might be some people’s idea of a bold choice, and I’d agree. The challenge is that trends and tastes change over time. I’d much rather swap out artwork than start shopping for new curtains.
Measuring out the grid and getting a rough feel for the size and spacing.
New house, blank canvas. Given the split-level stairwell and the way the view is partially blocked as you move through the space, it would always be difficult to appreciate one large artwork in its entirety. A collection of individual pieces felt like a much better solution. Each cover could stand on its own while also contributing to the overall wall.
Before settling on frames, we explored a few other display options. Some really interesting approaches came up, from frames that open up to insert the album, ledges, see-through perspex with brass fixtures, and even magnets. Real vinyl records were never really an option given the height of the wall. Plus, the stairwell leads up to the office, so there’s lots of foot traffic and a higher risk of things getting damaged.
No shortage of interesting ways to add colour and display album covers.
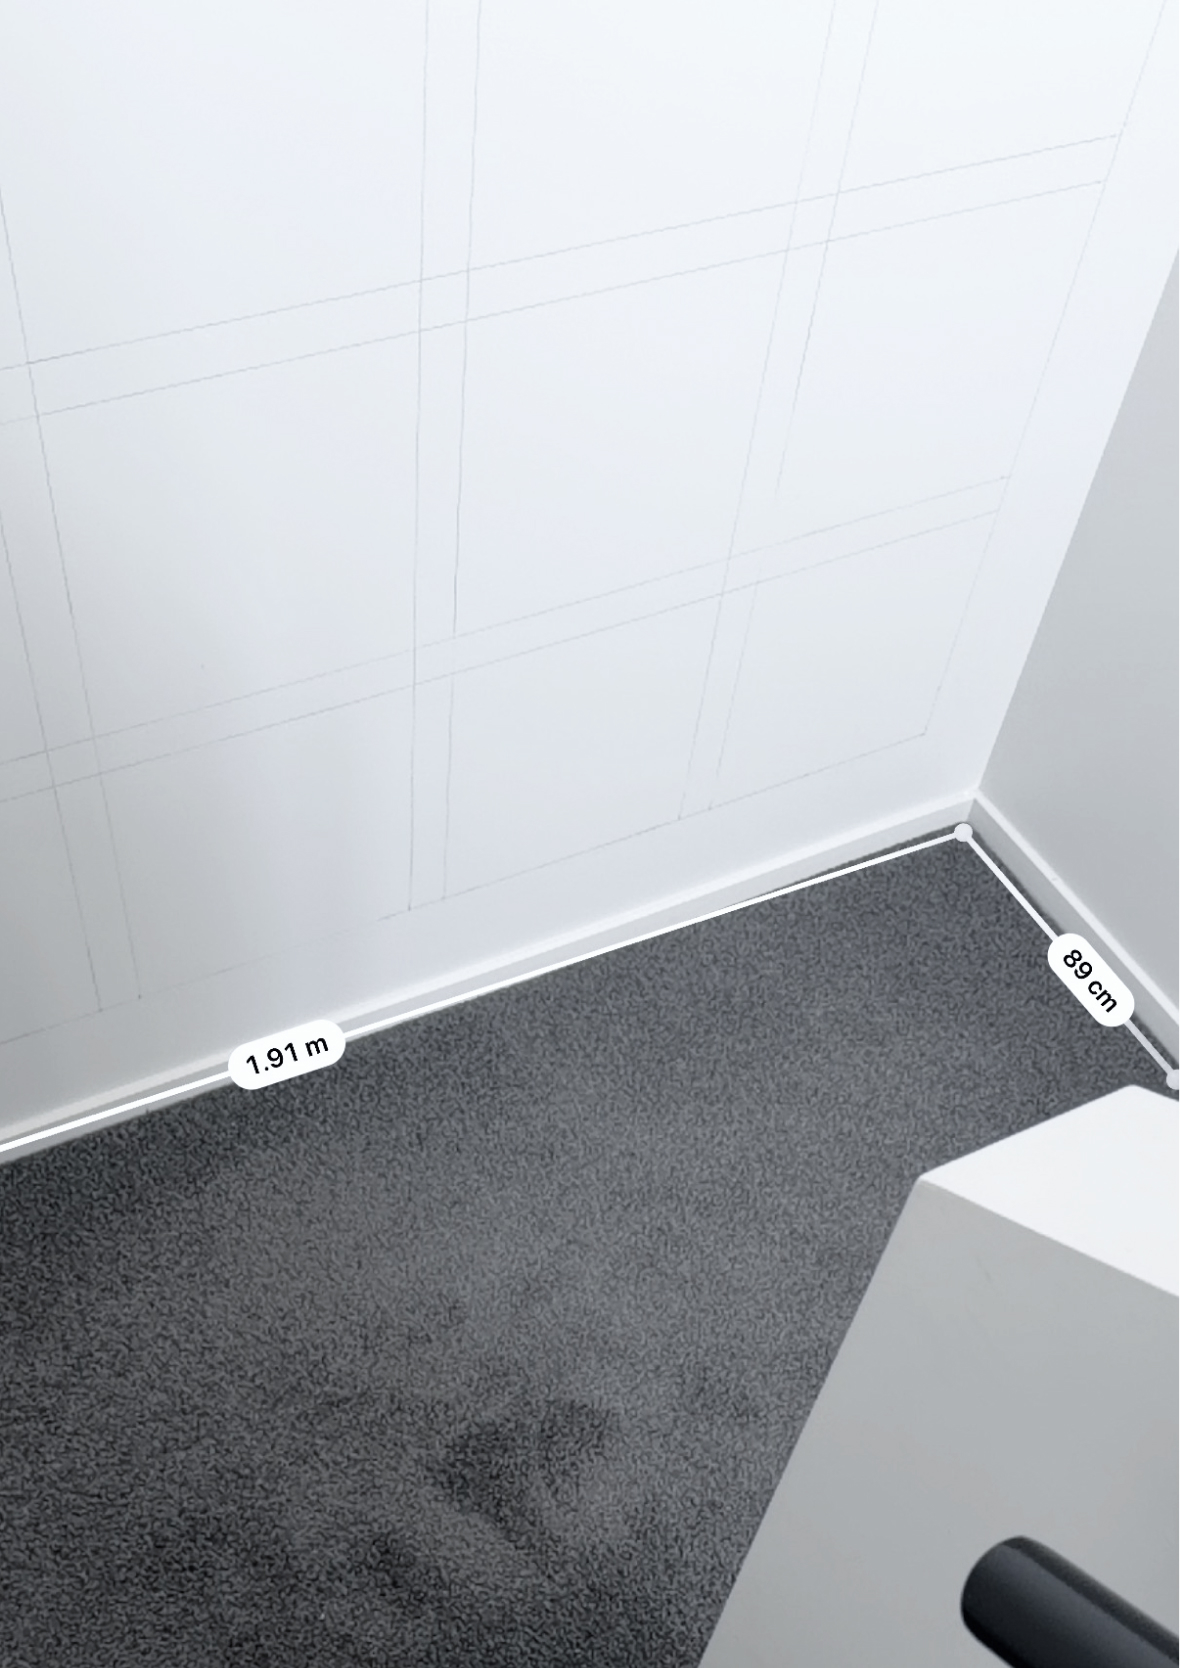
Measuring the wall area for 50 album covers
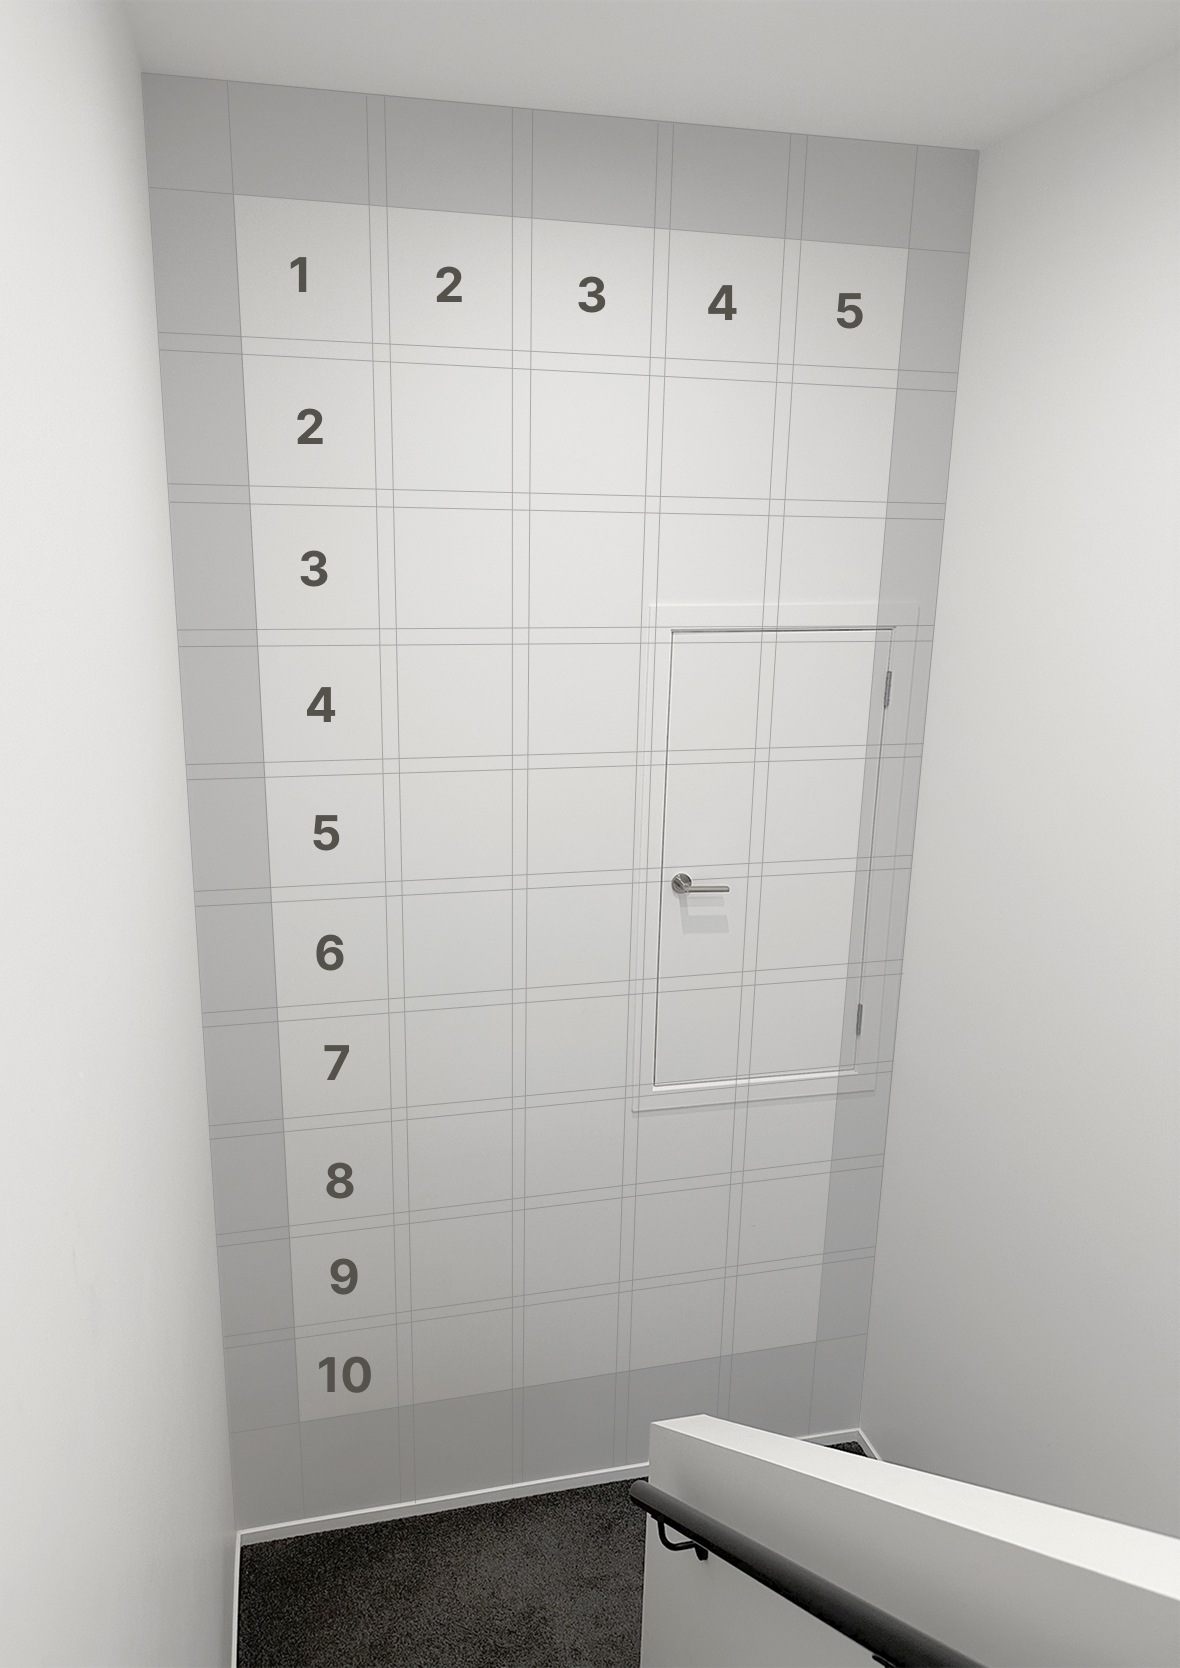
Taking a photo and dropping it into Photoshop allowed us to map out a grid and get a better sense of the proportions, perspective, spacing and approximate frame sizes. Once we’d committed to the gallery-wall approach, the next challenge was figuring out how many frames would actually fit without the wall feeling crowded.
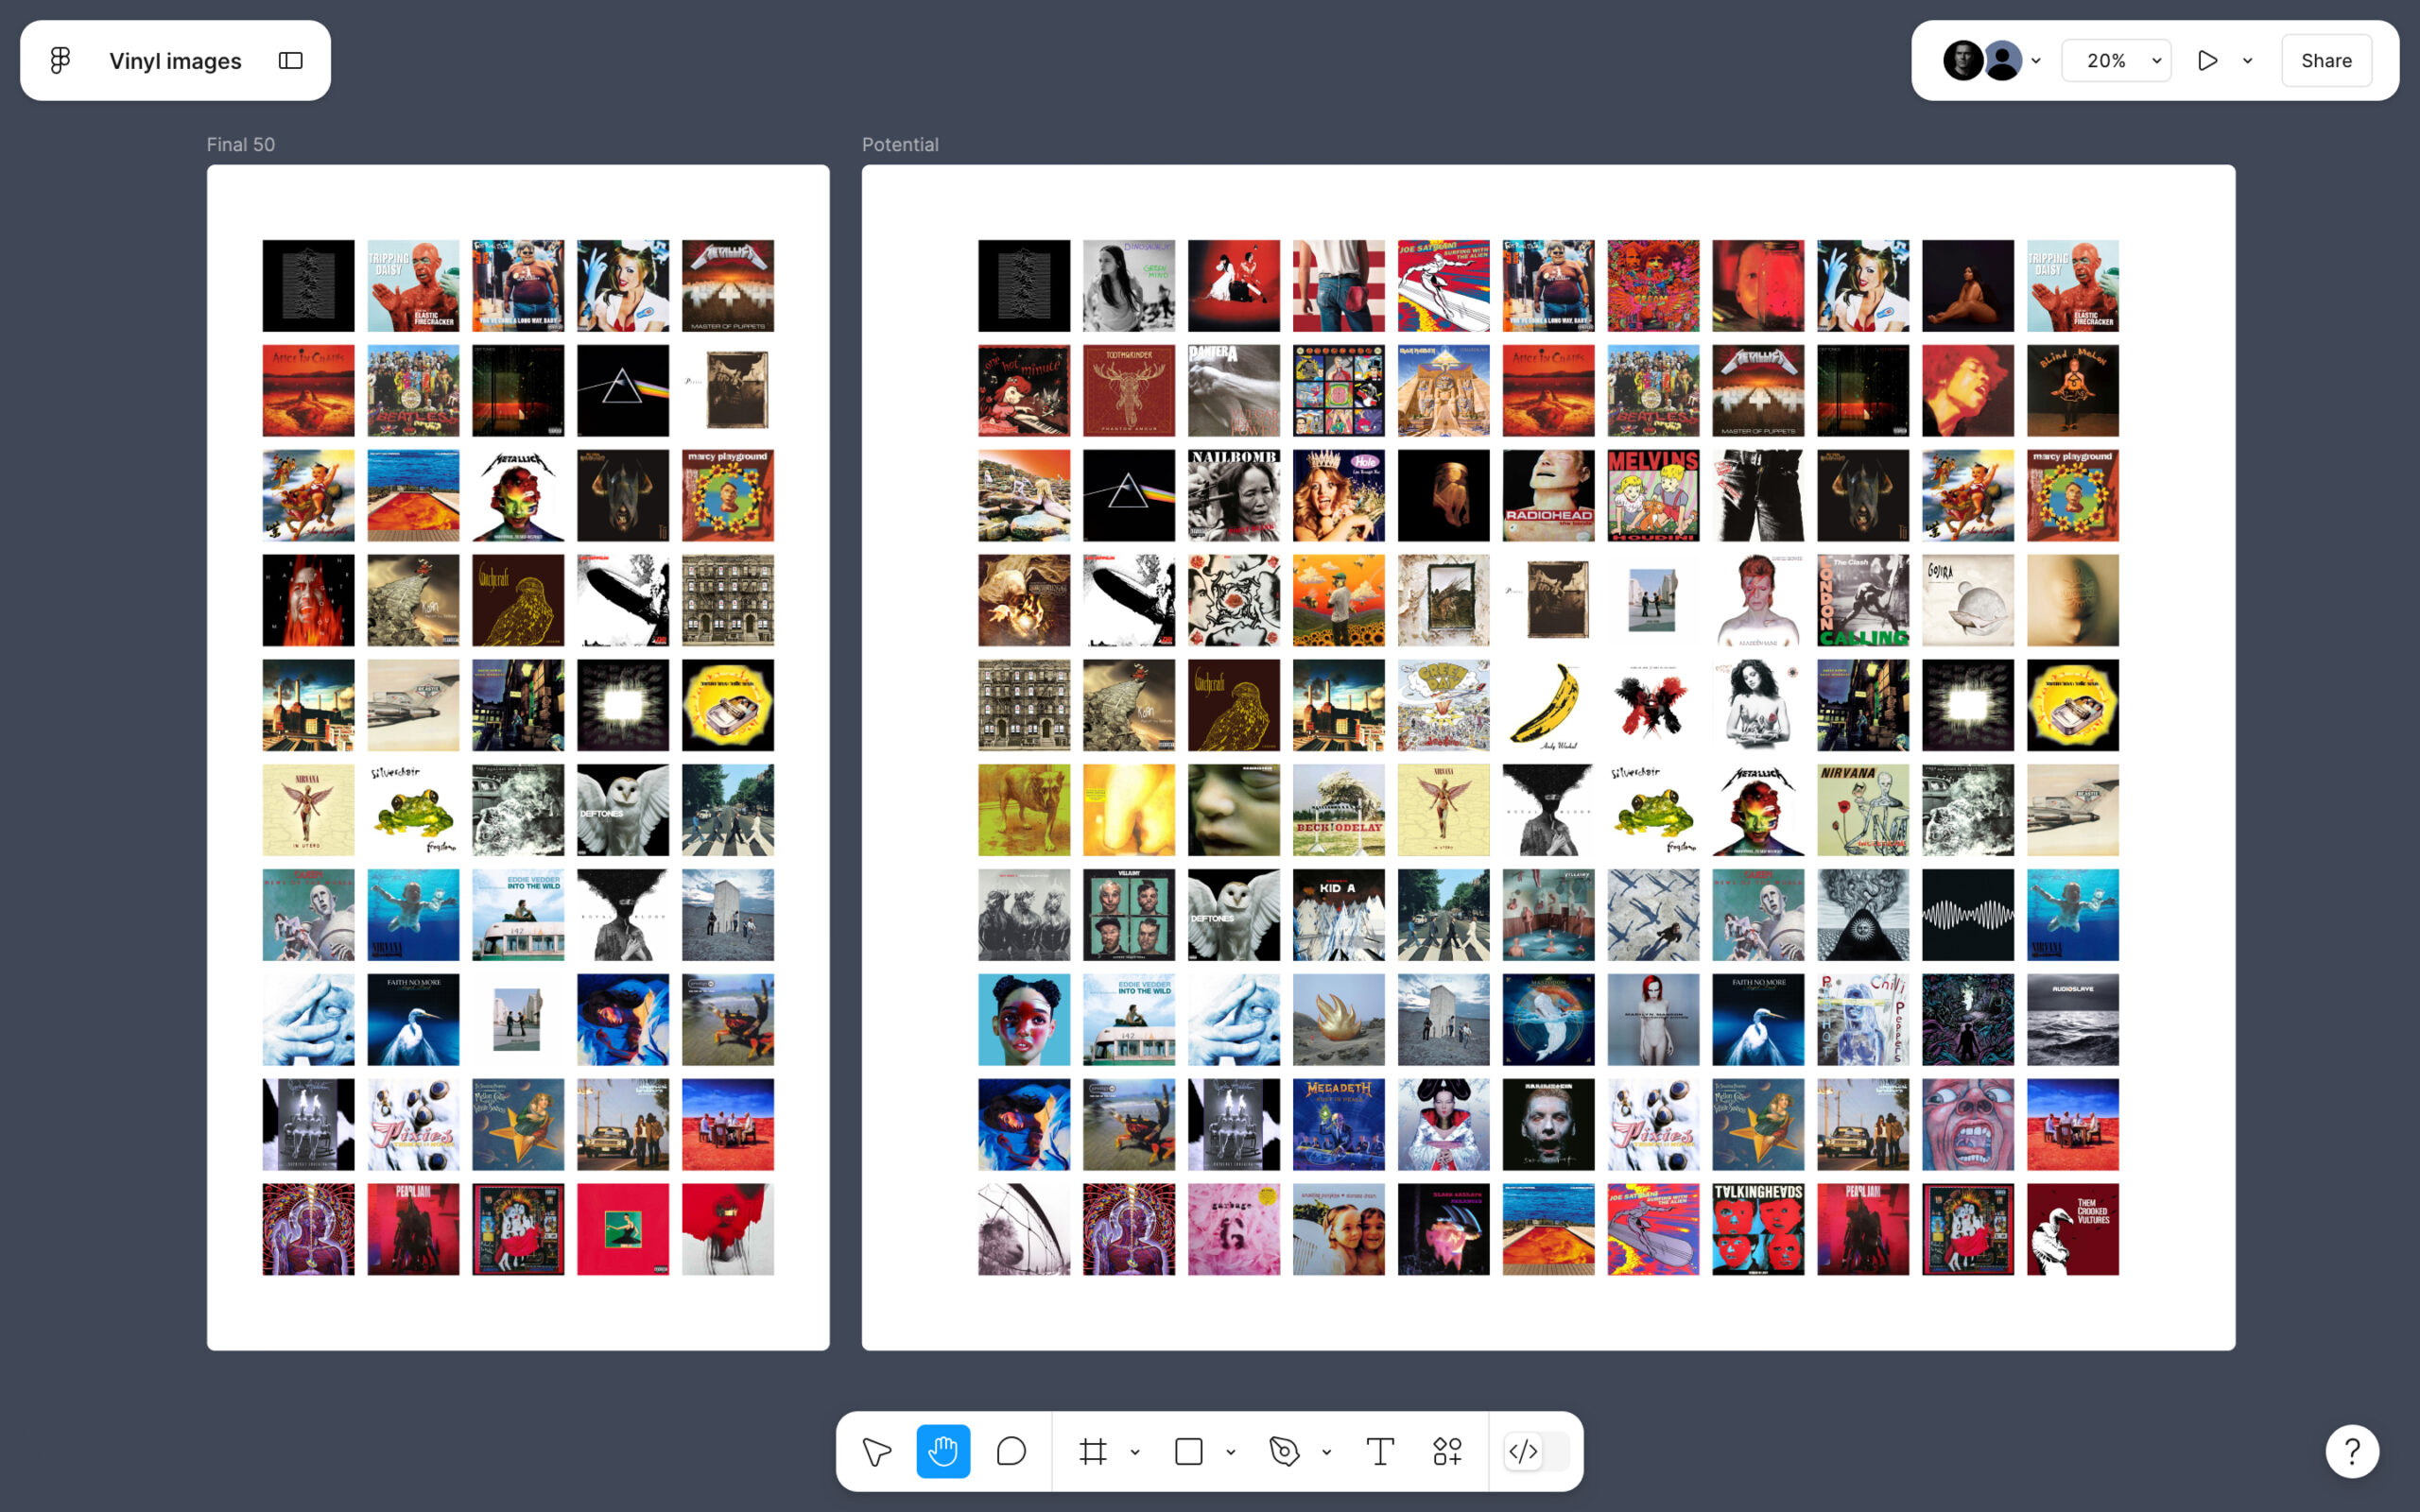
We experimented with different row and column combinations and found that a 5×10 layout gave us a nice round number without feeling overwhelming or overly crowded. The great thing about having a collection of images instead of one large piece of artwork is that it didn’t matter if some were blocked from view, you had multiple viewing angles.
Exploring acoustic slats, album selections, and a concealed door.
Prototyping, low-fi printing and colour theory
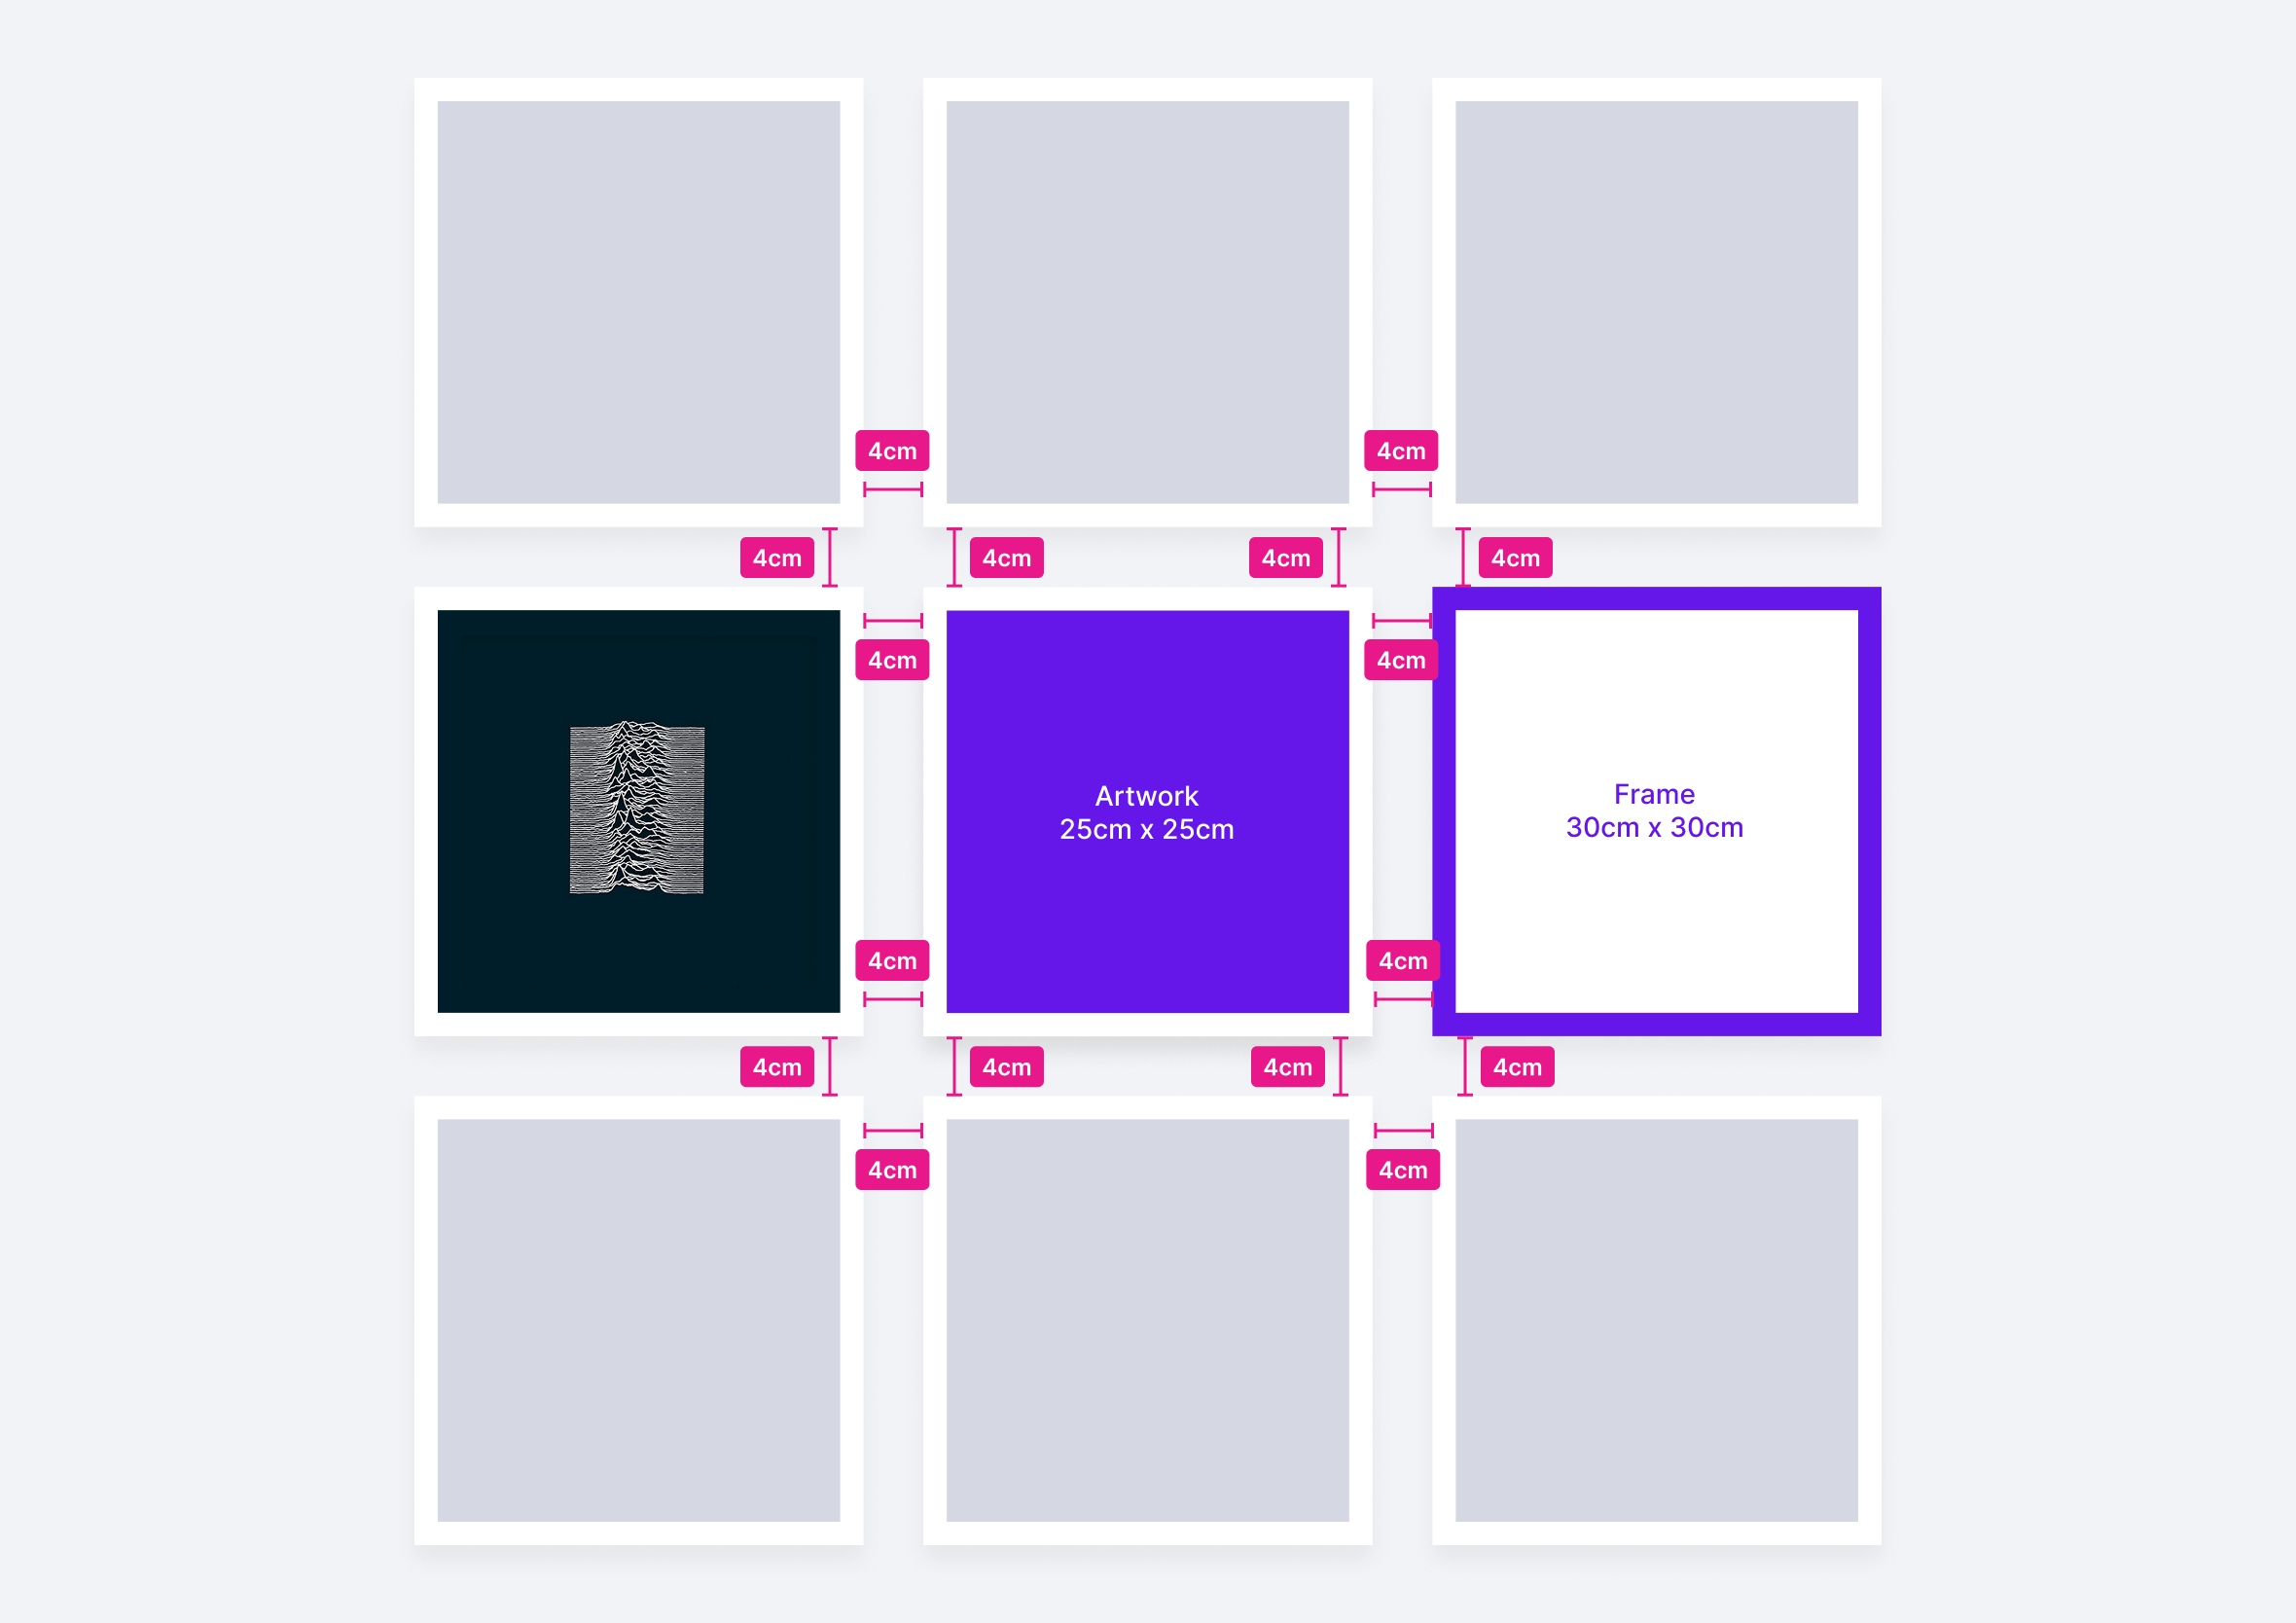
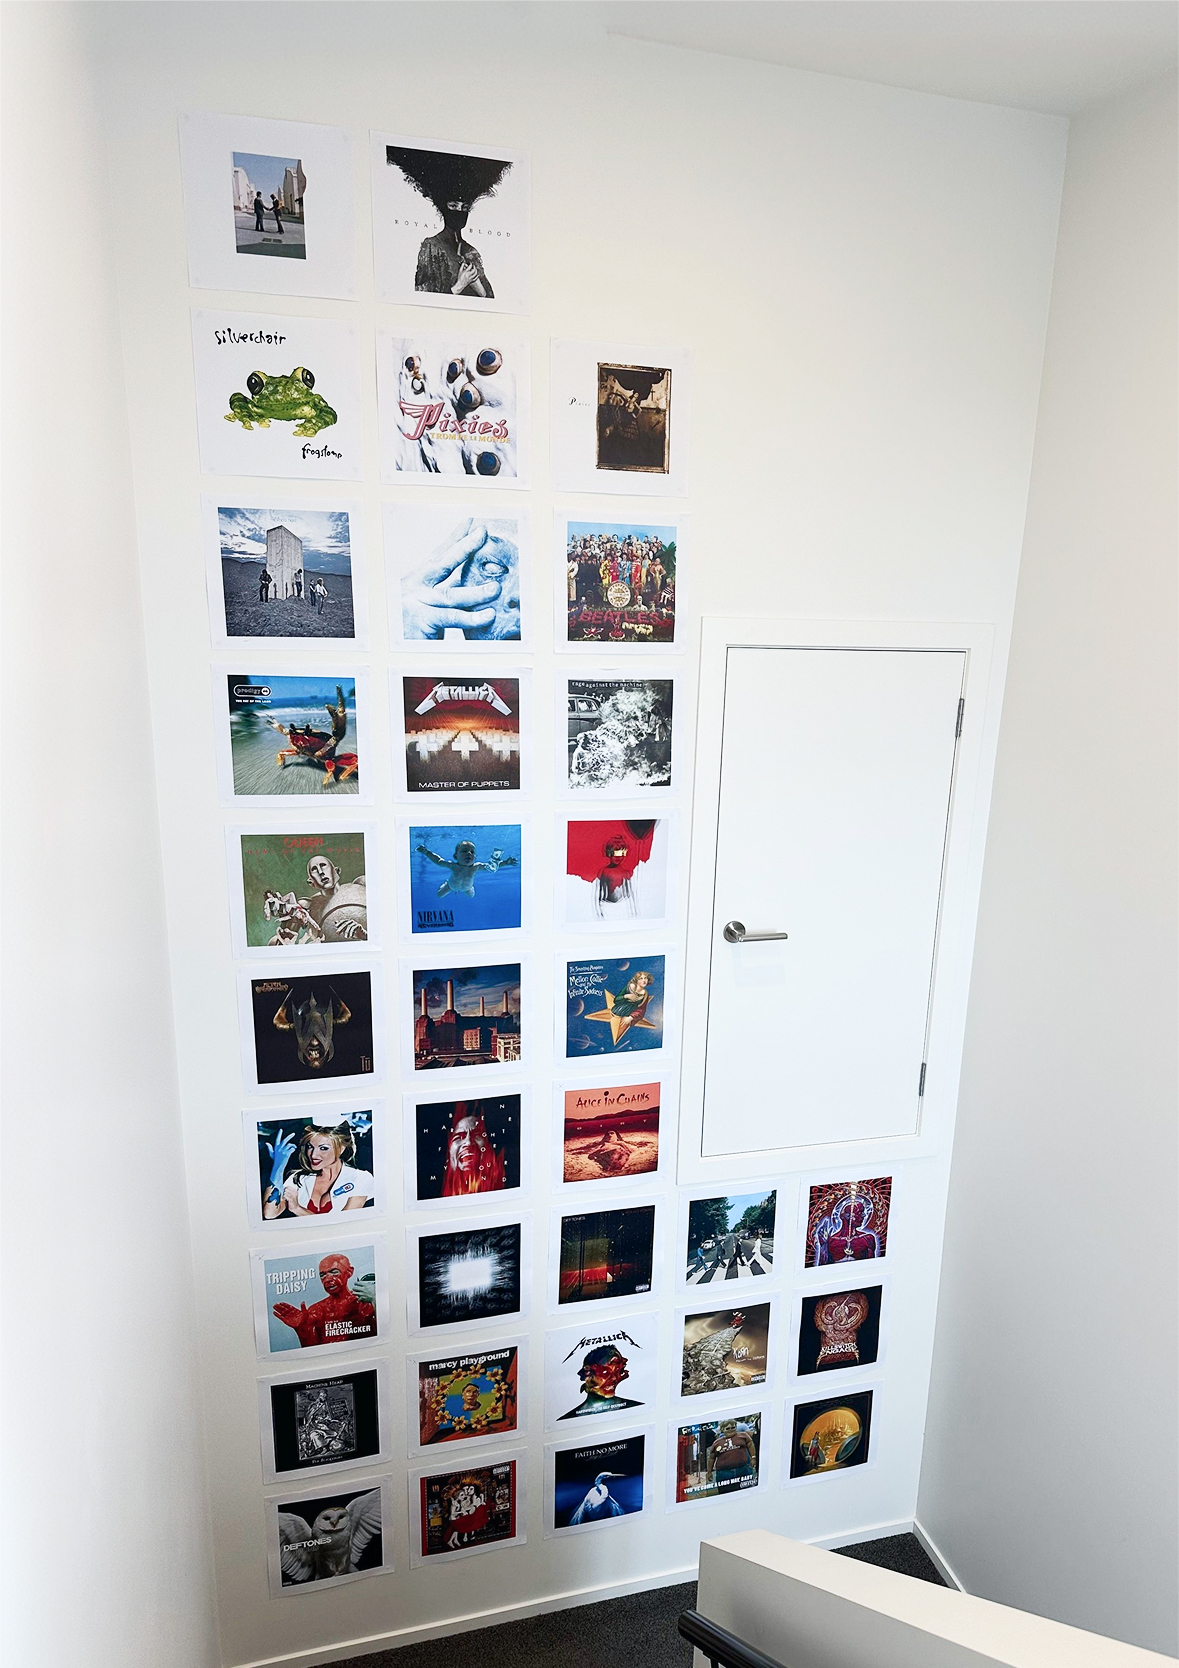
Printing A4 album covers quickly highlighted things we would never have spotted on a computer screen. Some covers looked fantastic on their own but clashed with neighbouring albums. Others created visual gaps because of large white backgrounds. The exercise also helped us settle on a 30mm frame, which felt balanced at this scale without overwhelming the artwork.
As much as possible, we arranged the covers by colour to create a smoother visual flow across the wall. We tried using software to help, but in the end this was more art than maths. We largely relied on what felt right.
Determining how well each album works individually and as a collection.We discovered albums with white backgrounds created “visual holes” or dead zones in the grid.Measuring out the grid and getting a sense of the size, spacing and scale of the project.
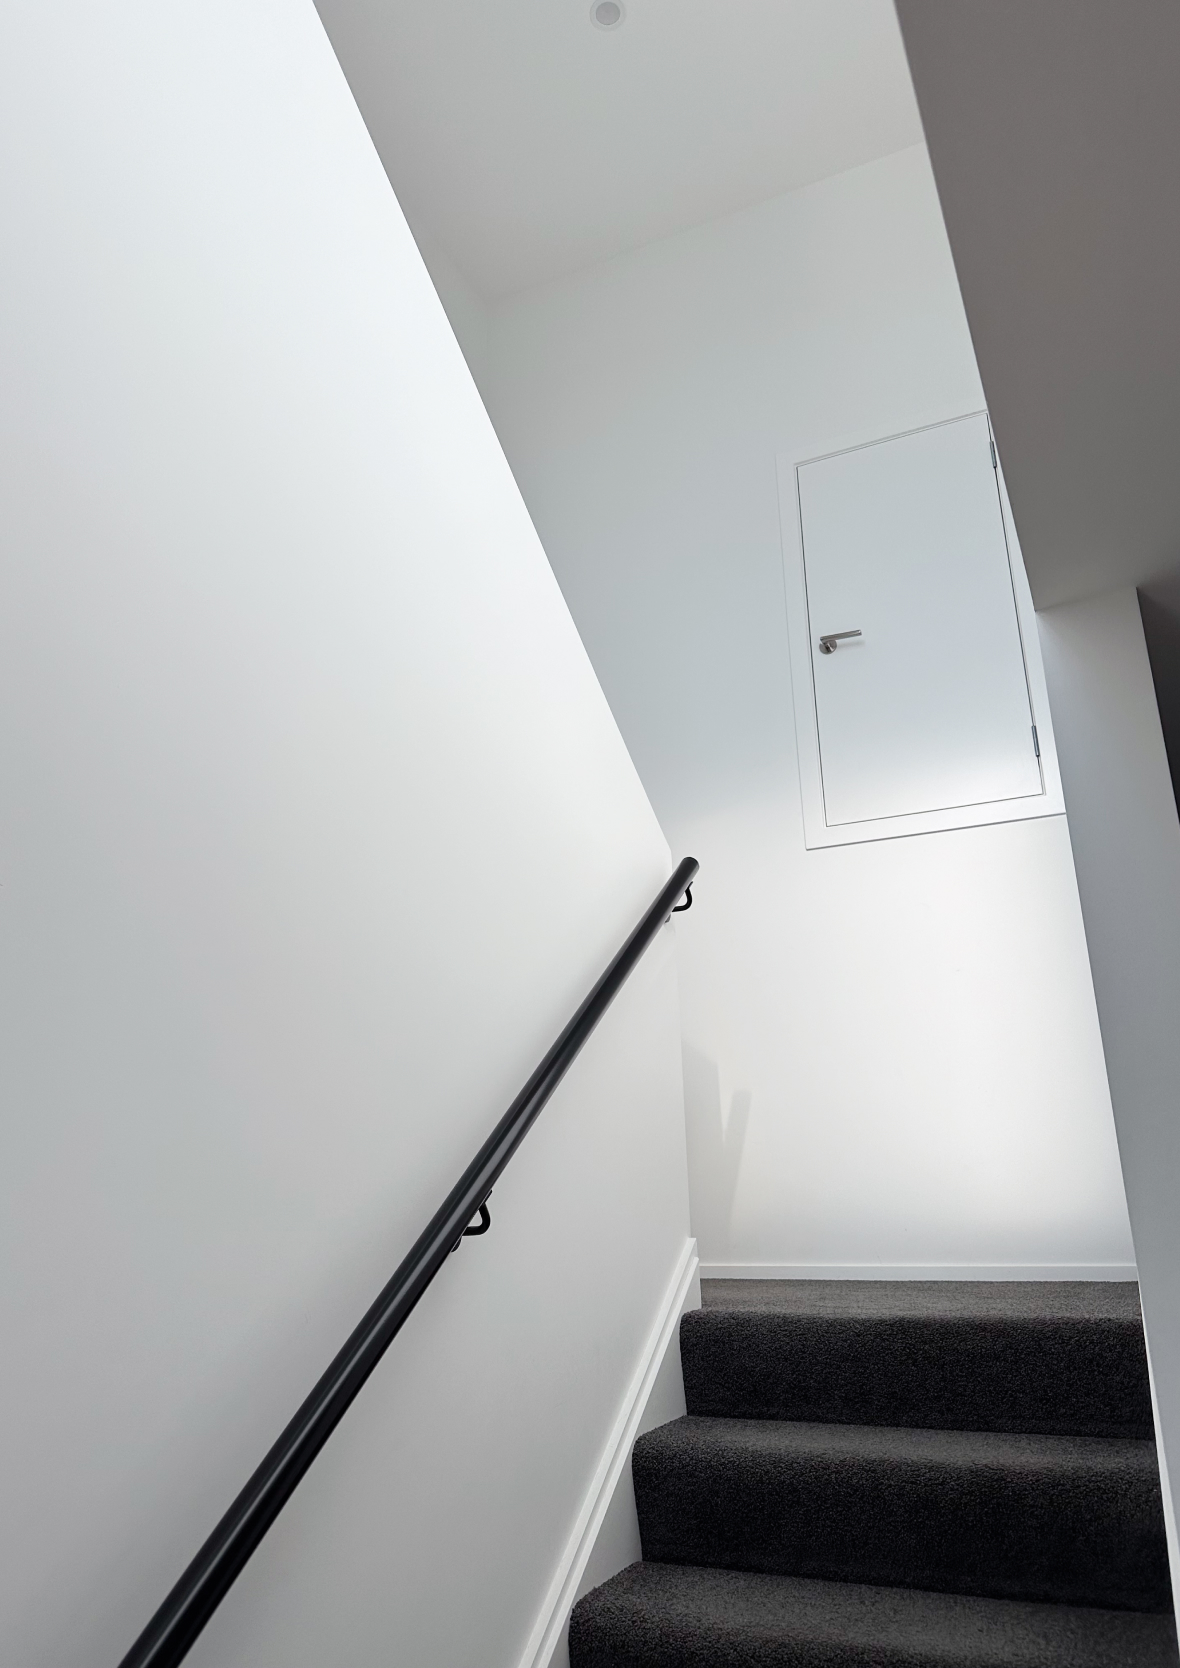
By removing the door things start to open up
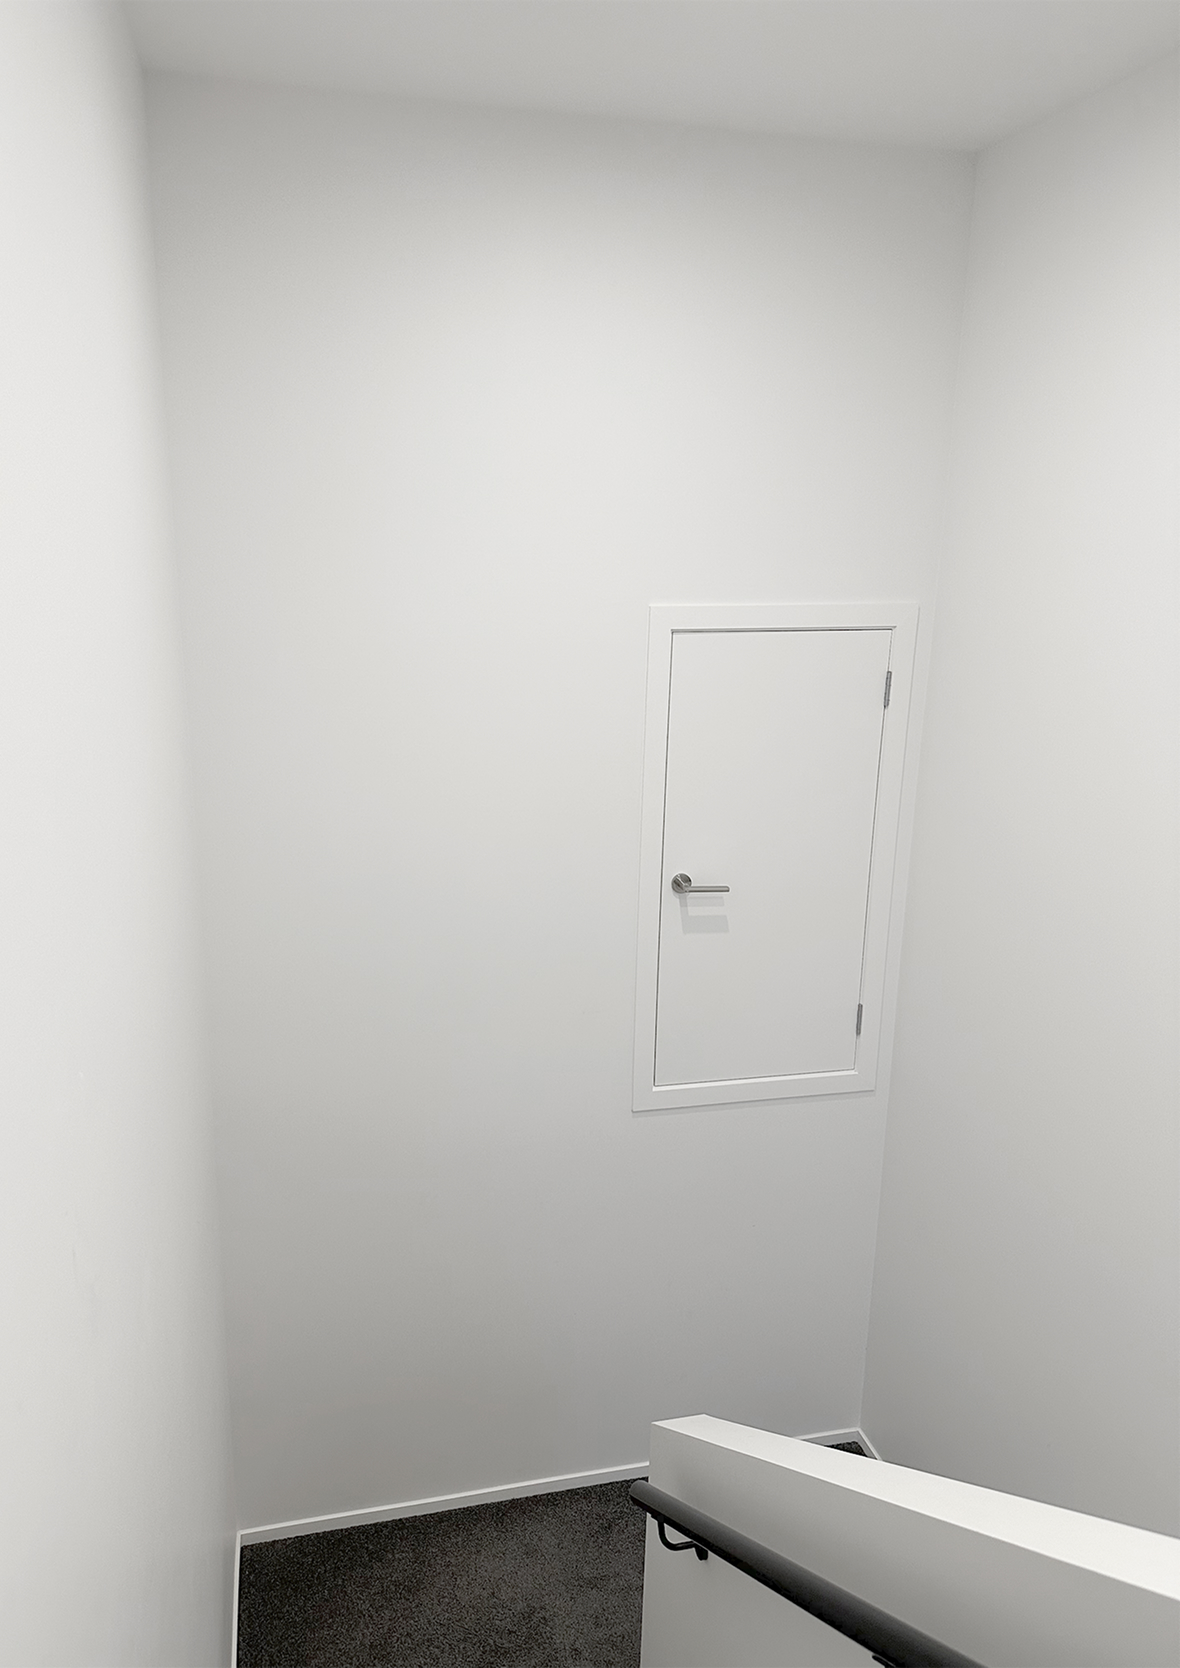
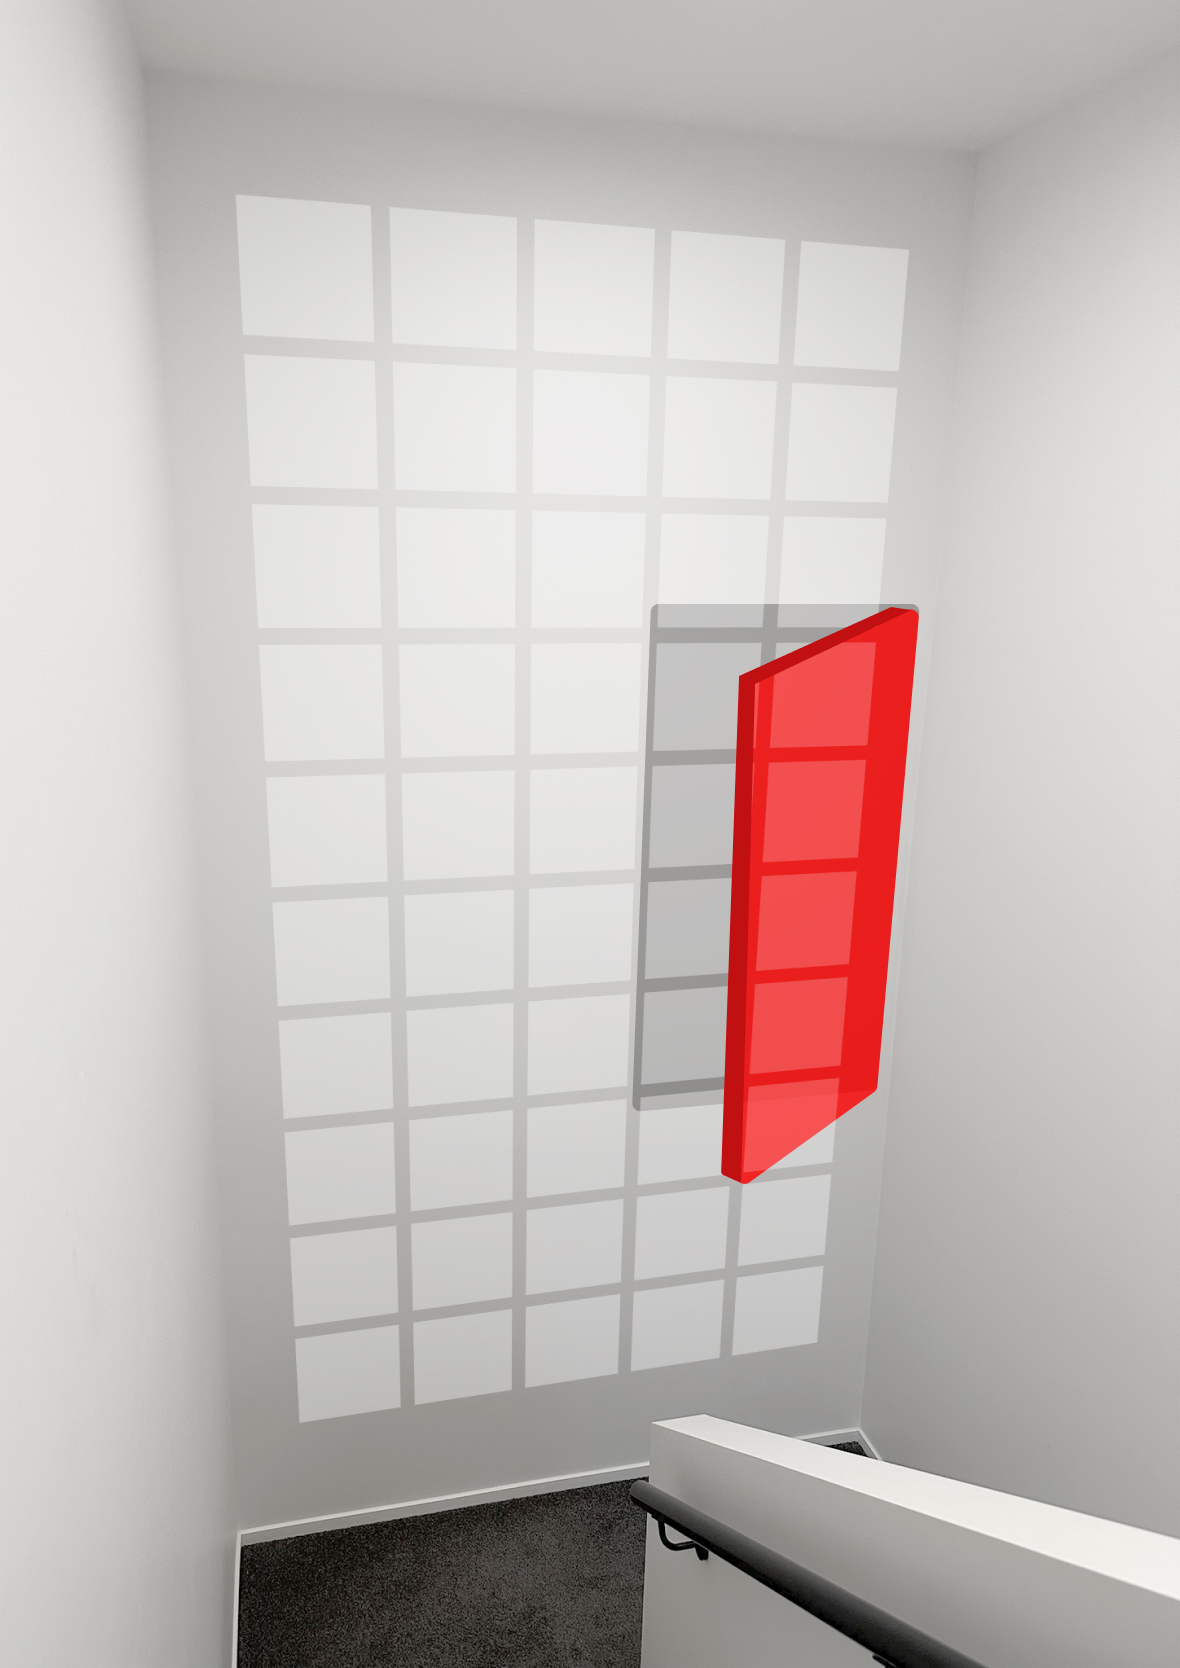
Because of a storage door halfway up the stairs, it limited what we could do with the space. Any large piece of artwork would always feel like it was sharing the spotlight with an awkward door rather than being the main focus.
Don’t get me wrong, the storage is fantastic for luggage and seasonal items. We just only access it two or three times a year.
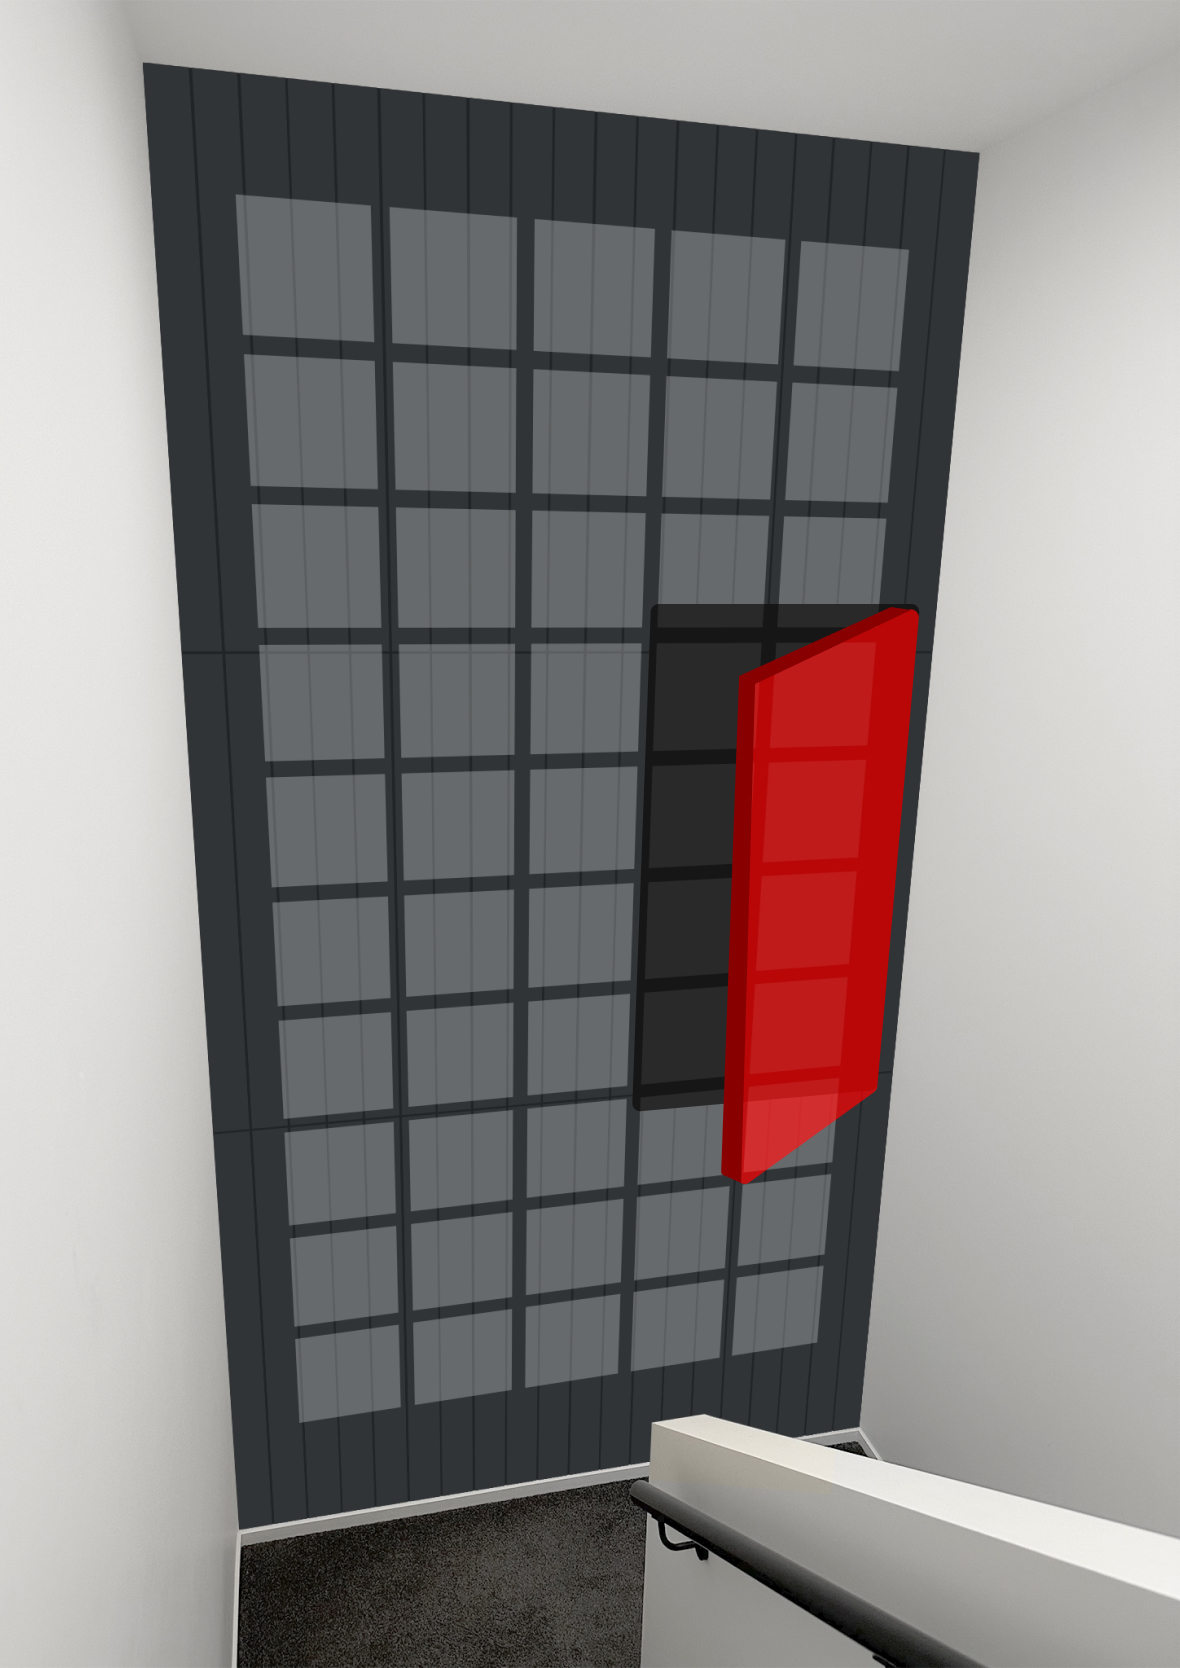
I explored a few options. A hidden door seemed like the best of both worlds at first, but the outline and joins would still be visible. I then looked at acoustic slats, which worked well for disguising vertical lines, but we’d also need horizontal lines to conceal the door frame. The spacing always felt awkward and the extra lines distracted from the artwork by introducing unnecessary visual noise. It also meant removing around eight frames every time we wanted access to the storage.
Exploring a concealed door and slats to hide it from view meant we weren’t constantly compromising to make it work.
Every attempt to work around the door created more problems than it solved. Builders, electricians, painters and plasterers came in to remove the door, close off the opening and relocate the power point. What was once an awkward interruption became valuable wall space.
Before any frames went up, the entire grid was mapped directly onto the wall in pencil so we could visualise the finished result.
Finding high resolution, print quality album covers
When we were in Taupo, driving back from the Pearl Jam gig, I noticed that My Music Taupo had done something similar with their window display. At first glance it looked like they’d used actual album covers, but on closer inspection they were printed stickers. I sent a message to the owner Jase to ask how he’d sourced the high-quality artwork files. He recommended Album Art Exchange, which was down at the time, but it pointed me in the right direction and I knew sites like this existed.
COV – Music Cover Search Engine
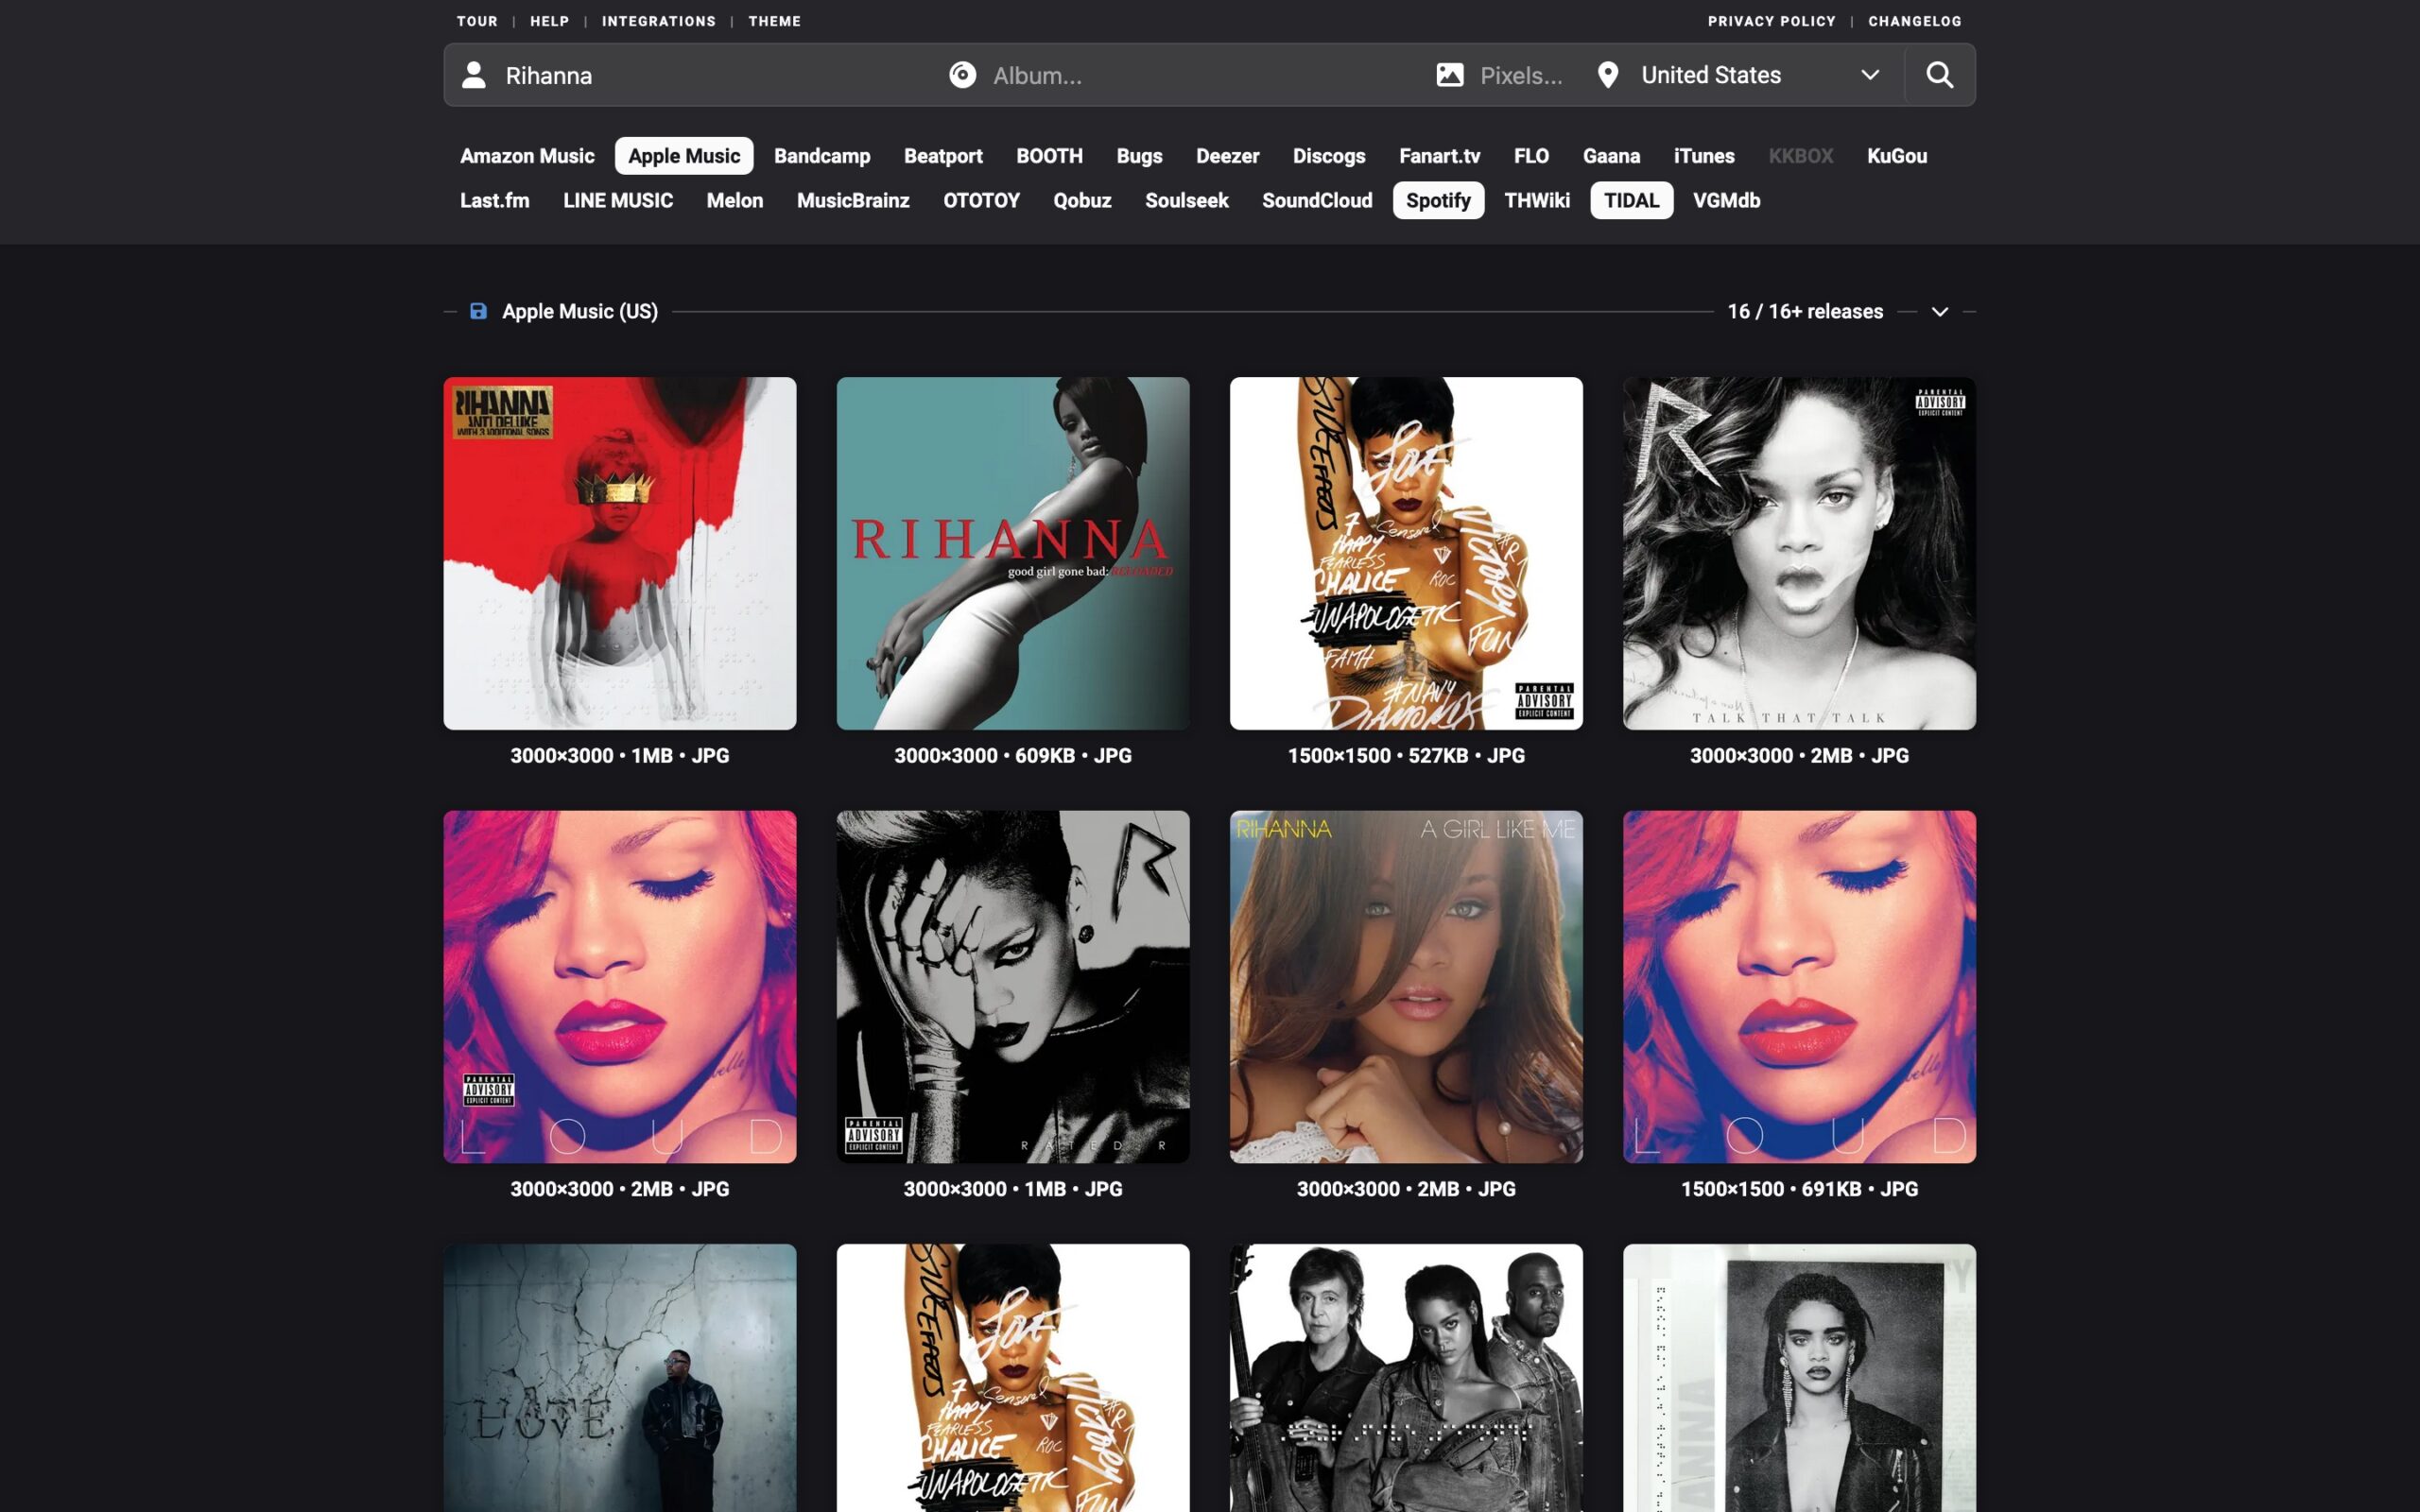
Once we decided to professionally print and frame each cover, the next challenge was finding artwork files with enough resolution to print cleanly at size. Most images online look amazing when viewed on screen, but fall apart when printed producing dark, blurry or muddy results.
We didn’t have access to a scanner and then I discovered COV – Music Cover Search Engine which proved to be an invaluable resource. You can search by artist name, album name (or both), music platforms or country. You can even search by barcode or catalogue number to find the exact cover of the physical album you own, making it surprisingly easy to find high-quality artwork files.
Album covers professionally printed and framed by Framefox
We could have purchased 50 frames separately and organised the printing ourselves, but that still left us sourcing prints and assembling everything individually. After looking around, we couldn’t find anything that felt quite right. A friend recommended Framefox, who handle both the printing and framing in one place.
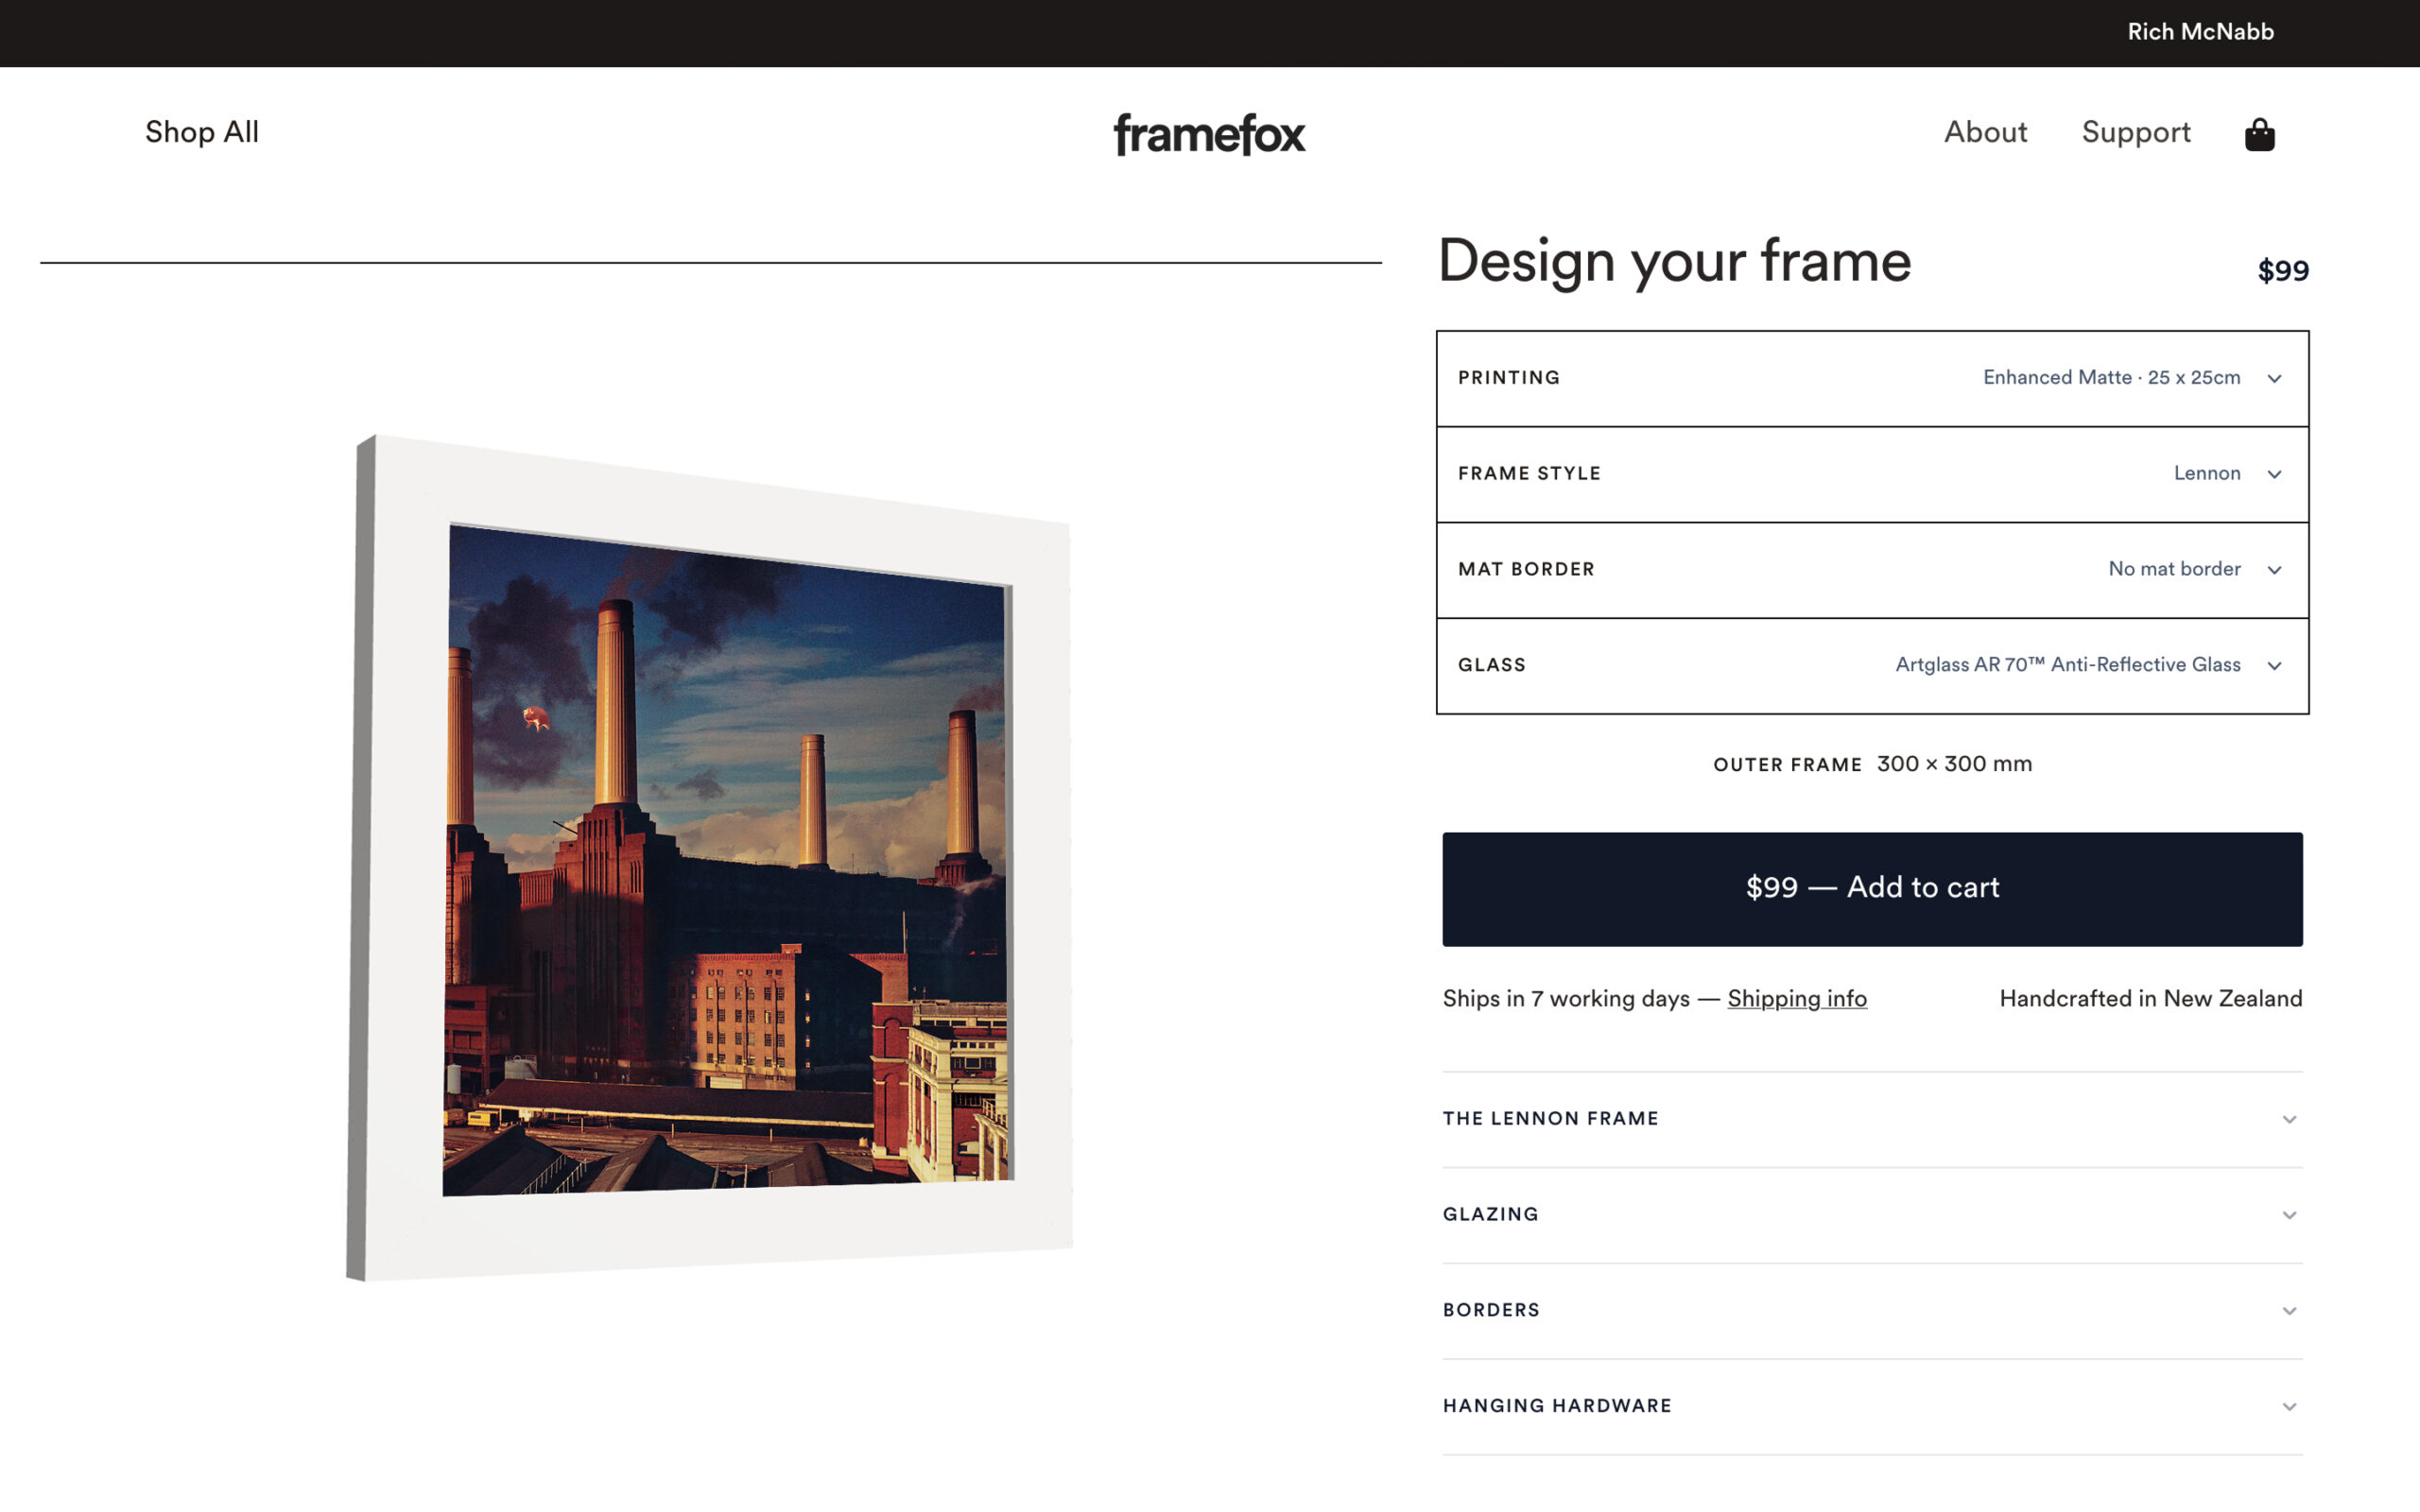
Framefox – customising the frame
With this many frames involved, we wanted to see the quality before committing. Framefox offered 10% off a first order, so we treated one frame as a prototype to assess print quality, frame depth and glass finish. The obvious test subject was Pink Floyd’s Animals. The flying pig felt like the right choice.
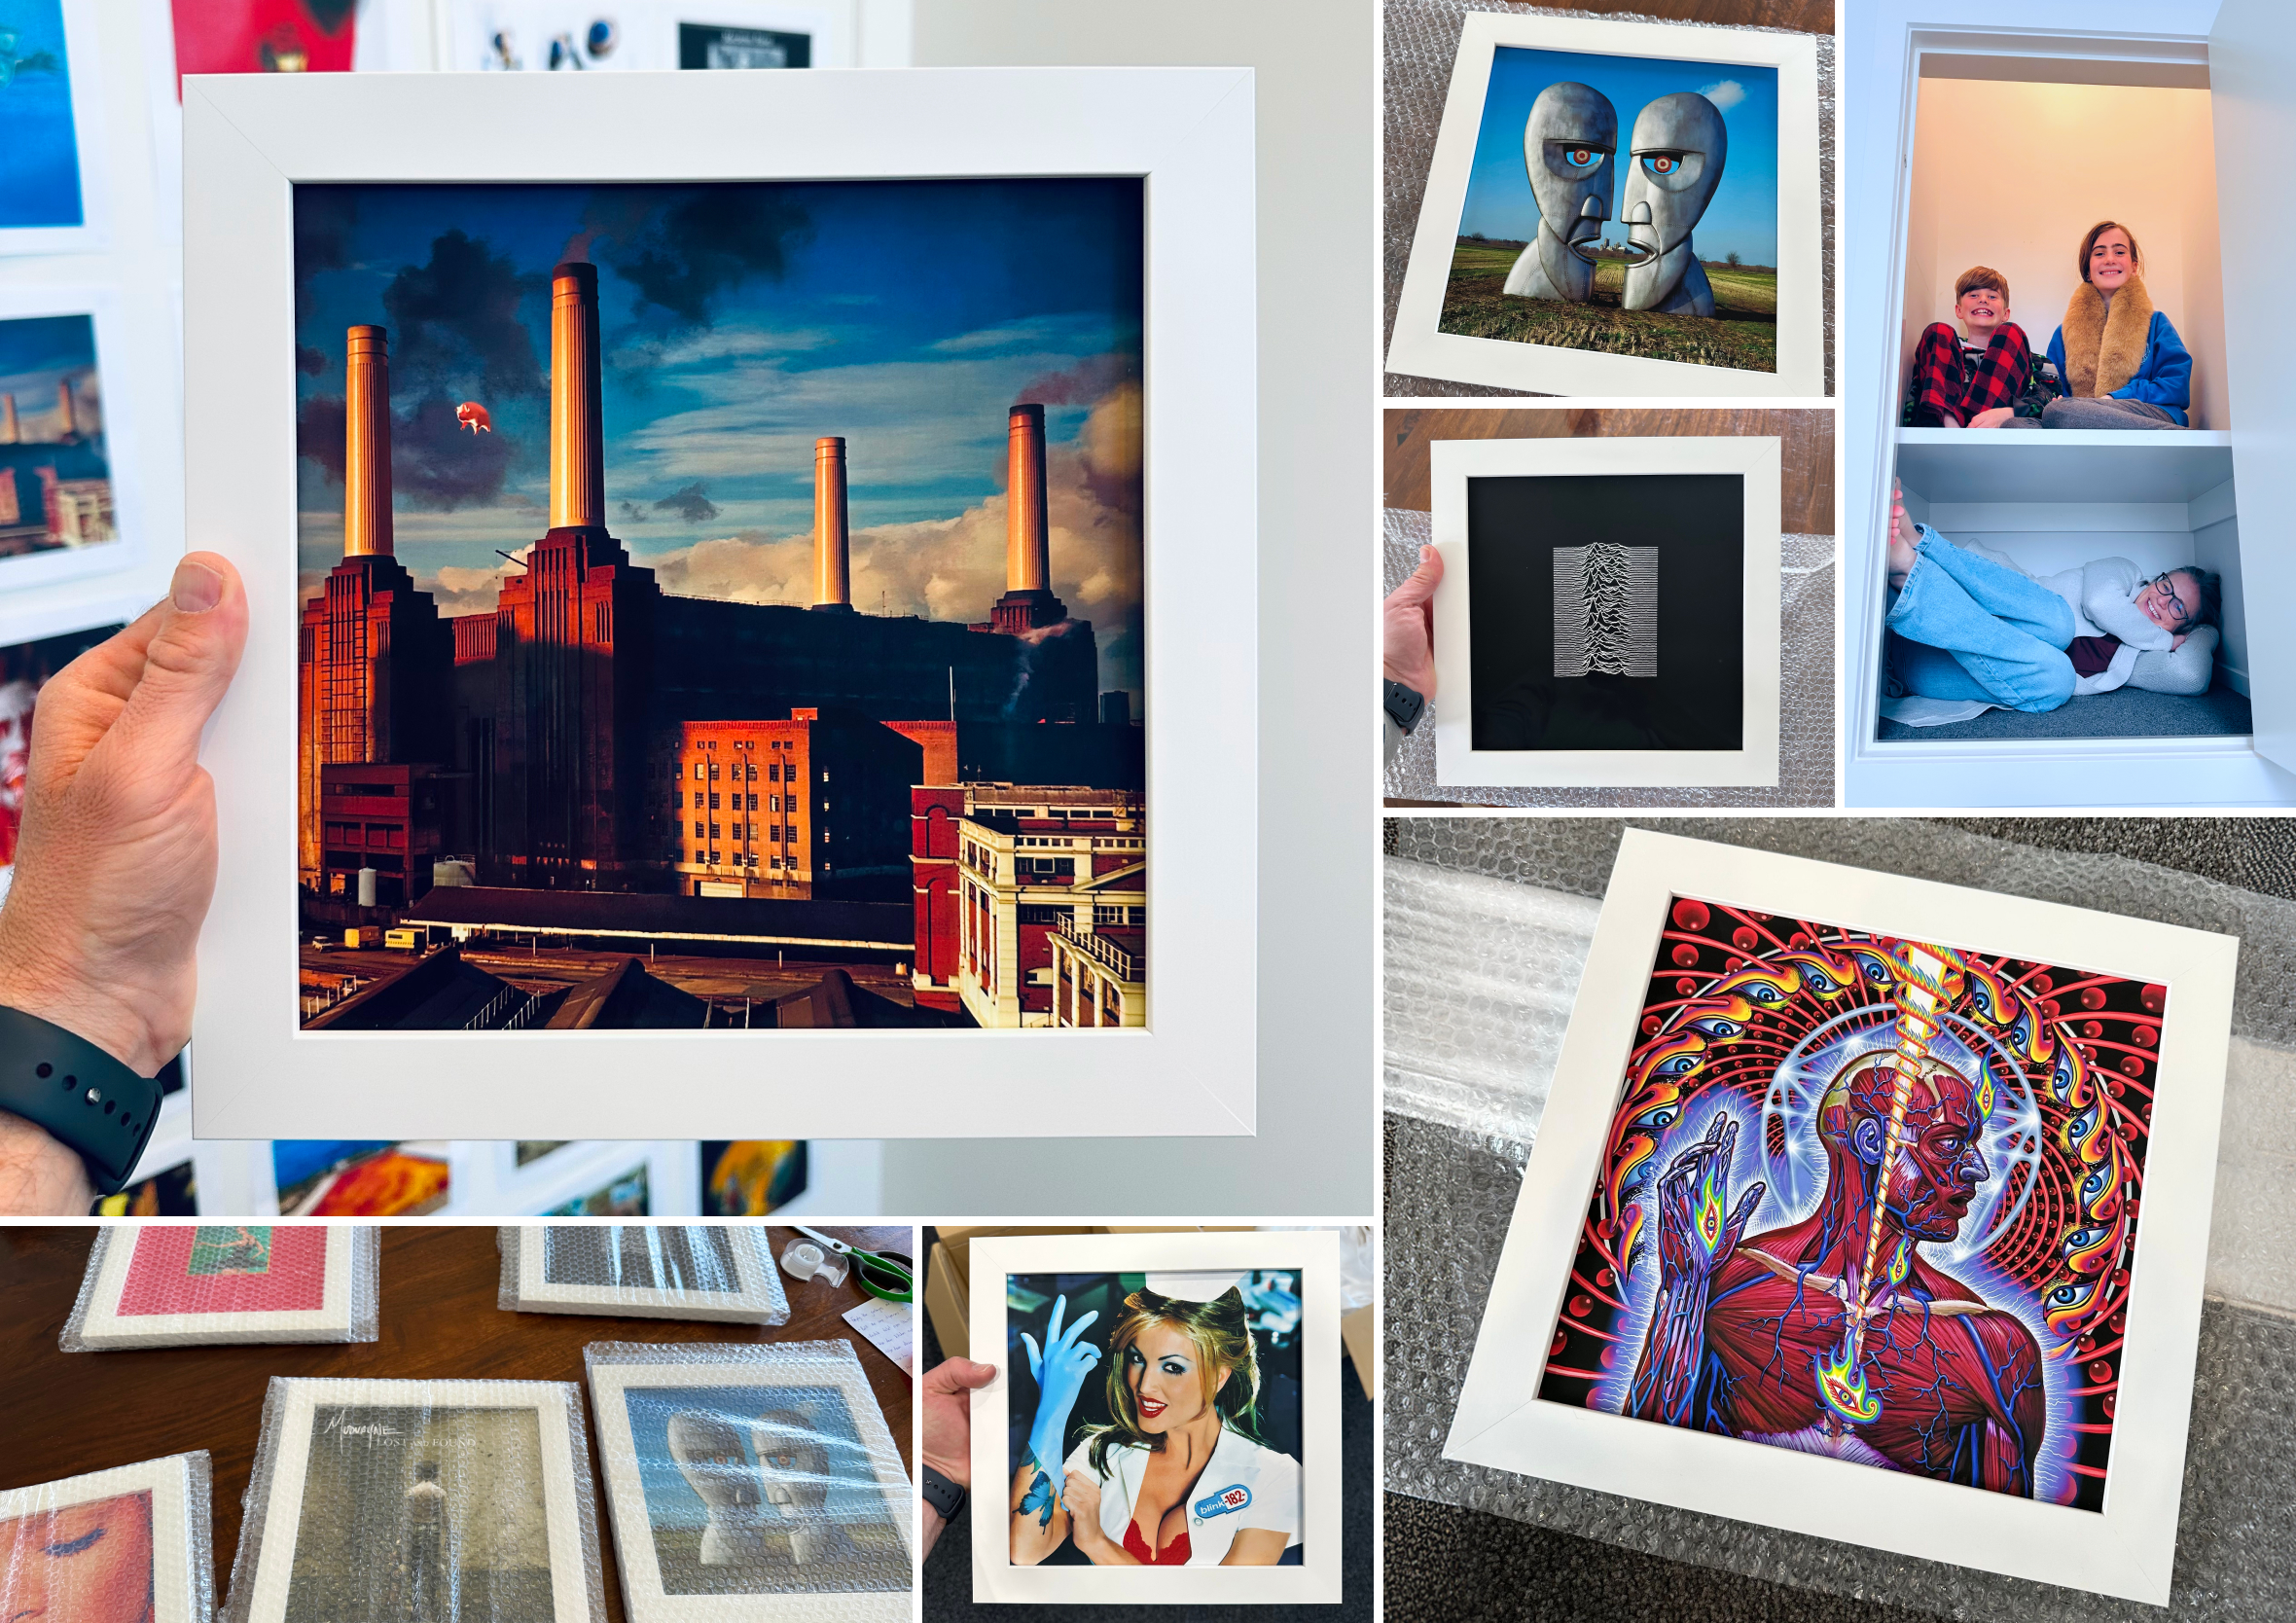
When it arrived, the anti-glare glass gave the artwork an almost screen-like quality. It genuinely looked as though the image was being displayed on a high-end monitor rather than sitting behind glass. We were sold.
Buying frames in small runs whenever a sale ran helped keep the cost manageable.
Each frame came in at roughly NZD $99 and included professional printing, custom framing and anti-glare glass. Buying in batches whenever Framefox ran a sale helped spread the cost across several months rather than taking one large hit. Once the final 50 were locked in, we placed the remaining orders until the collection was complete.
Two features worth calling out for anyone doing something similar: AI Upscale can increase image resolution for larger print sizes, and Smart Enhance automatically adjusts brightness, colour and sharpness. Both made a noticeable difference on a few of the older, lower-resolution covers.
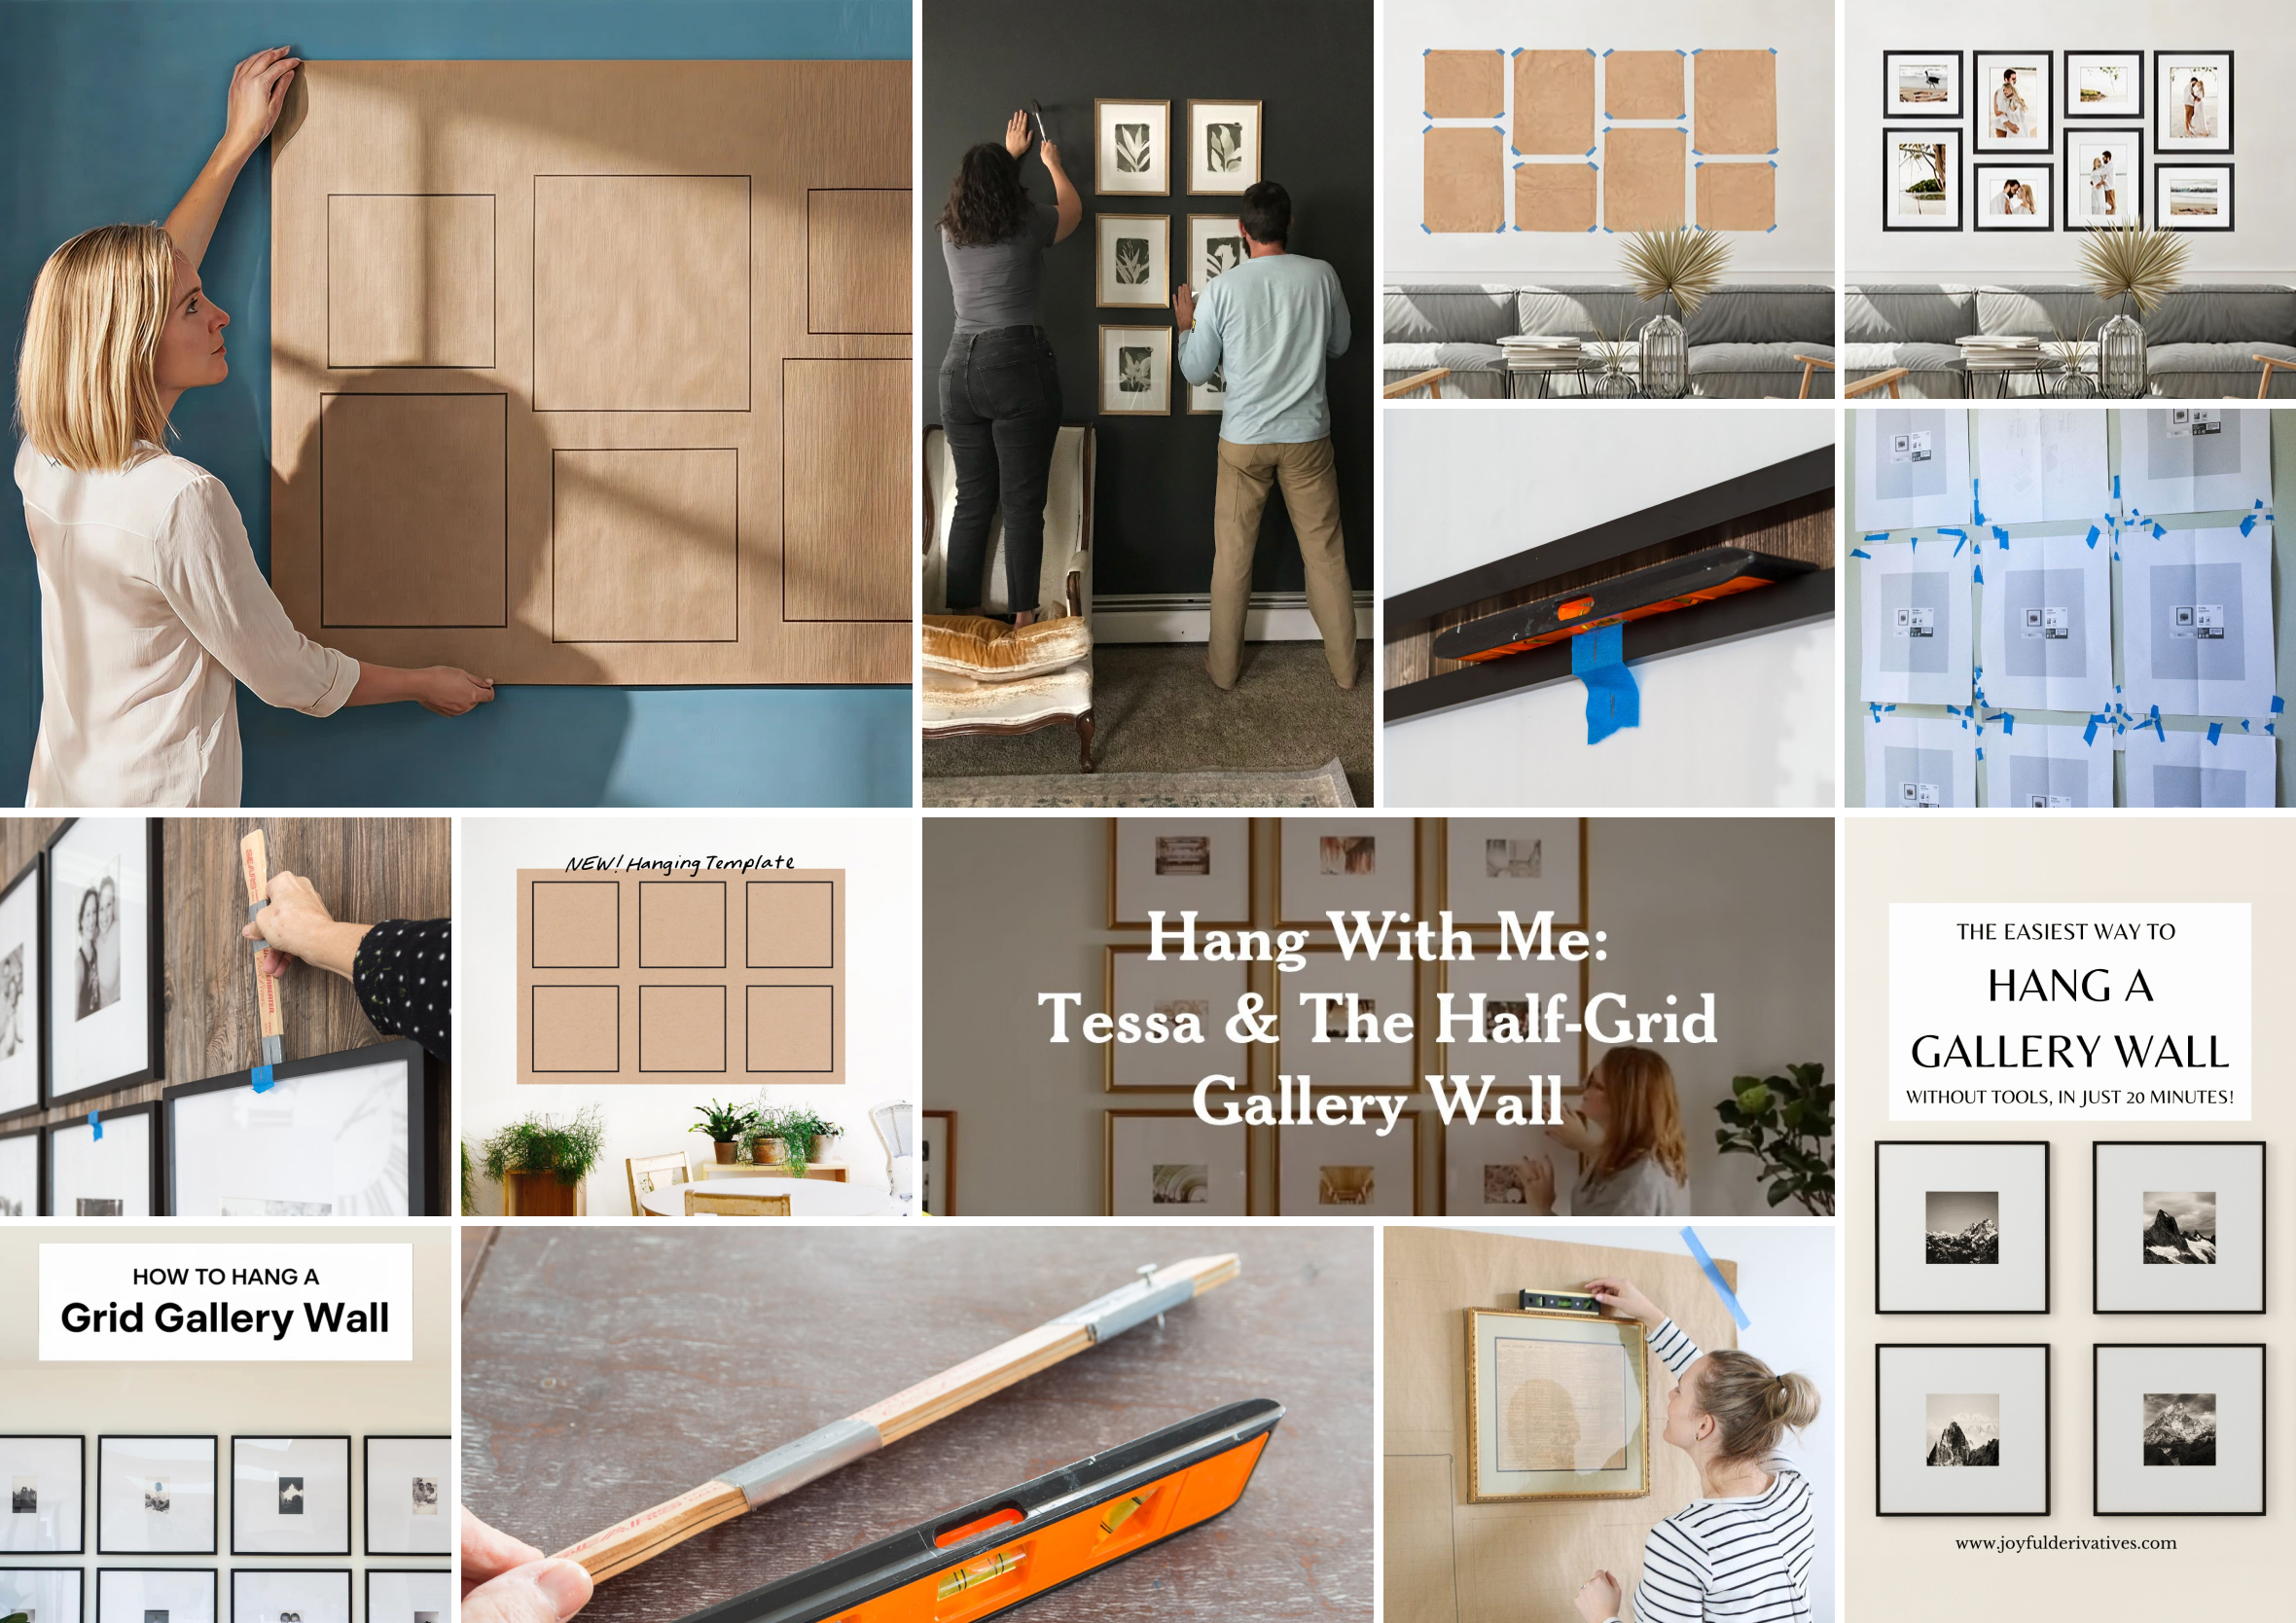
How to hang a large gallery wall, what I learned
After watching a seemingly straightforward tutorial on hanging a 3×3 gallery wall, I confidently bought a torpedo level, painter’s tape and paint stirrers. It fell apart quickly at this scale.
The tutorial relied on a centre frame acting as an anchor point for everything else. That works for nine frames. It becomes much more complicated when you’re dealing with 50. Using a paint stirrer to mark nail positions was also surprisingly challenging. There was always something in the way, so you could never guarantee an accurate marker.
The supplied seesaw hooks introduced another problem. Every time someone walked past, the frames would drift slightly out of alignment. At this scale, small drift across 50 frames becomes very visible very quickly.
Online tutorials were great to understand the basics but fell apart quickly at the scale I wanted.
Beehive Picture Hangers: the solution that actually worked
More research led me to Beehive Picture Hangers. The beehive hooks use a honeycomb design that locks frames in place and prevents any sideways drift, even on a busy stairwell.
The beehive hooks use a honeycomb design that locks frames in place.
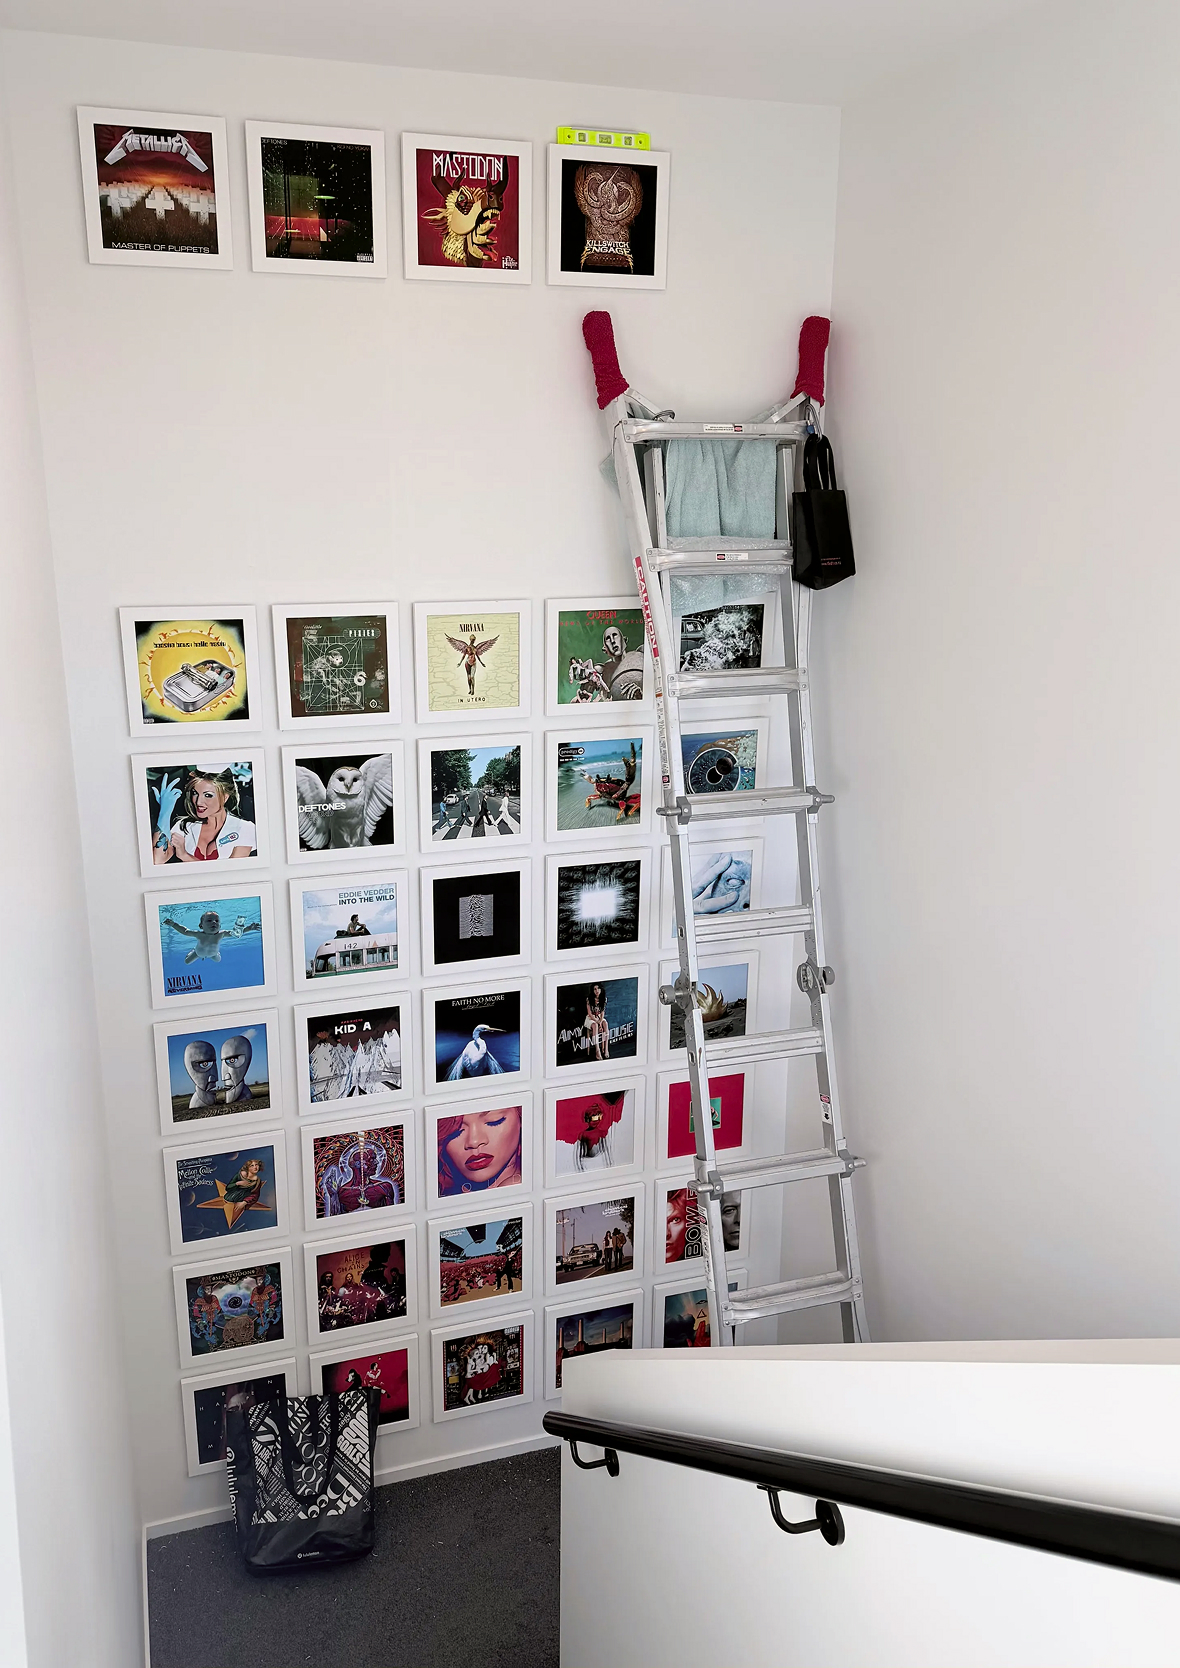
They’re expensive at NZD $283.67 for the 5 boxes of 24 hooks but figured buy nice or buy twice. Since each frame needs two hooks for stability it adds up pretty quick, but by this stage cutting corners didn’t make sense. We removed every seesaw hook and replaced them with honeycomb hooks before rehanging the entire wall over two weekends.
The process was painfully slow. Frame by frame, adjustment by adjustment. It felt a little like stop-motion animation.
We also discovered that despite ordering frames of the same size, small variations existed because they were handmade. Eventually, we embraced those imperfections. The goal wasn’t perfect measurements. It was making everything look visually aligned, even if the spirit level occasionally disagreed.
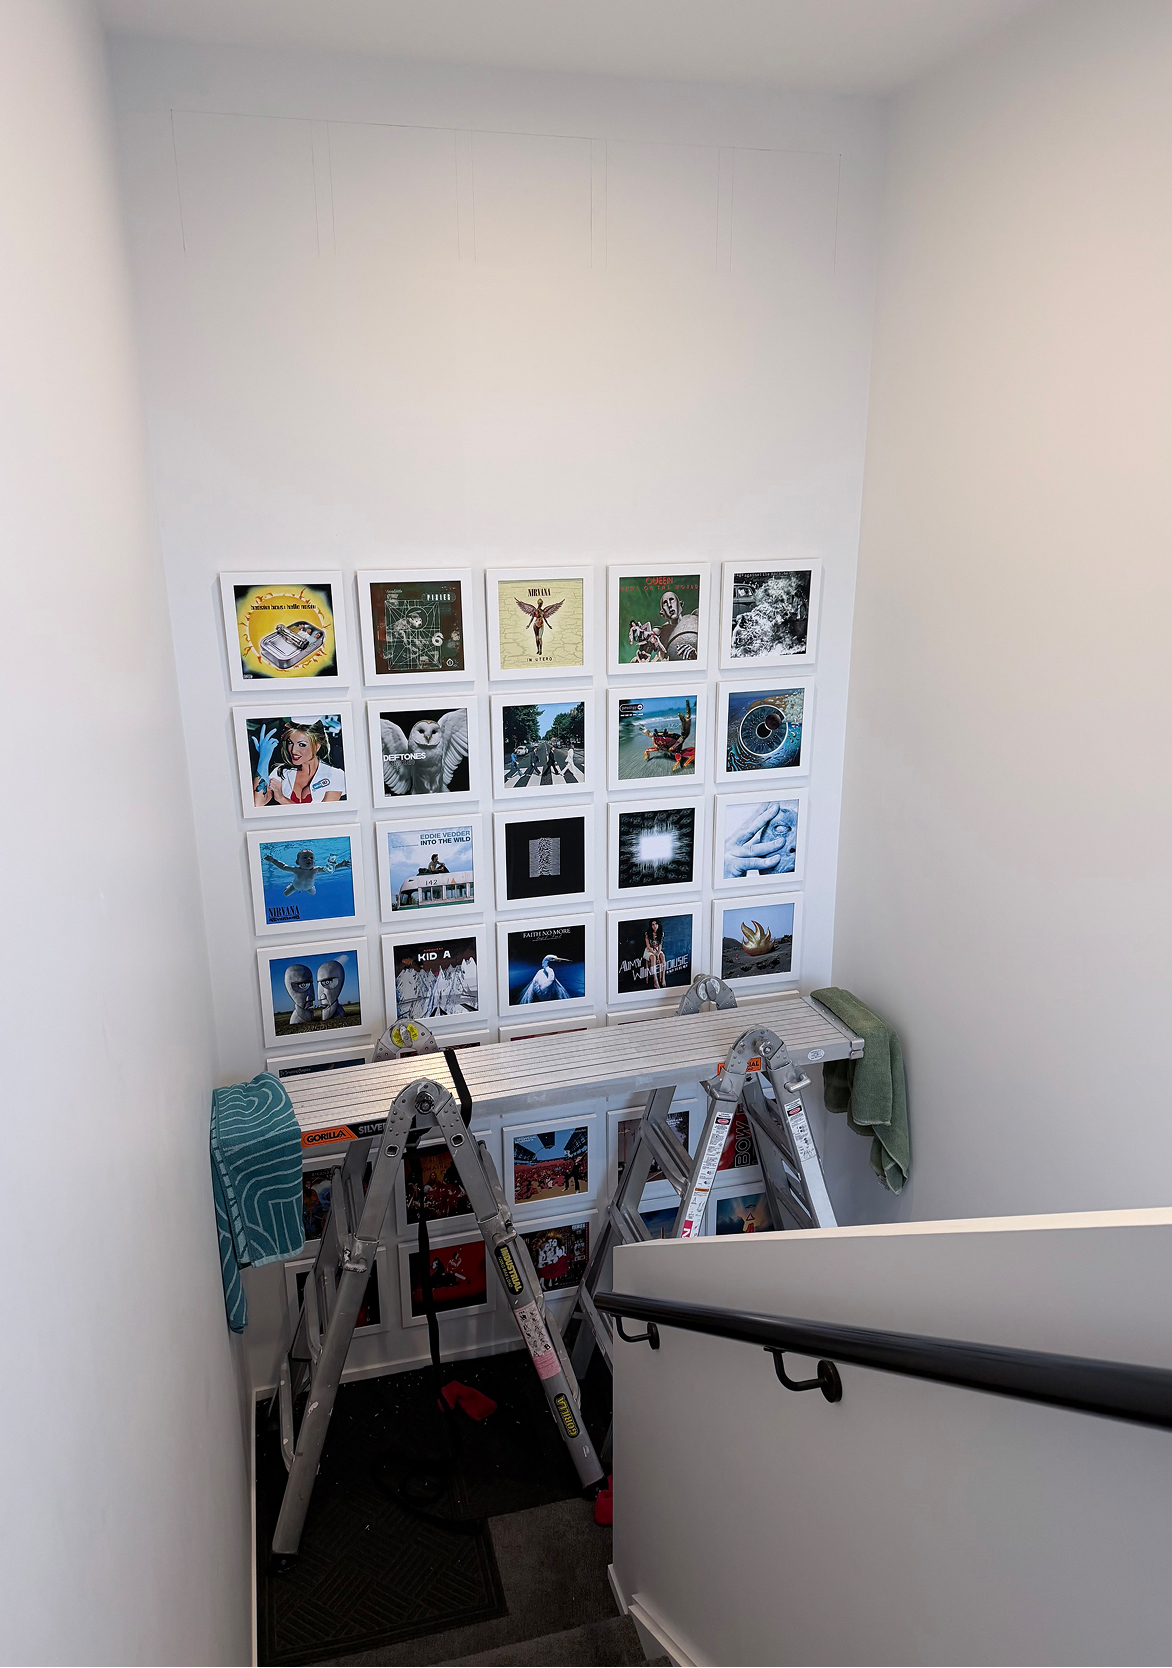
Working at height
Working at height was always going to be one of the biggest challenges.
We considered scaffolding, but the space was too restricted. The builders suggested either a platform ladder or a long extension ladder. A platform ladder looked ideal but would likely only be used once before taking up permanent space in the shed. We briefly experimented with a platform between two ladders, but it didn’t feel particularly safe. In the end, a long extension ladder did the job.
The final frame to install was Taylor Swift in the top right corner (you can view in the completed photos below). Easily the most nerve-racking placement. If I fell backwards, there was another 5.5m of stairwell behind me. Slow and steady won the race.
Slowly starting to take shape.
What the whole project cost
Spread across batches over about 18 months, it never felt like one large outlay. Buying in small runs also gave us time to refine the selection before committing to the full 50. I haven’t included the cost for the removal of the storage door as this was done as part of some other work around the house, and doubt this step is common for most people.
Item
Cost
50 Framefox prints and frames
$5310.50 (spread over 18 months)
5 Boxes Beehive Picture Hangers
$283.67
Supplies (torpedo level, painters tape and pencils)
$20.74
Total
NZD $5,614.91
18 months, 50 frames, still makes me smile
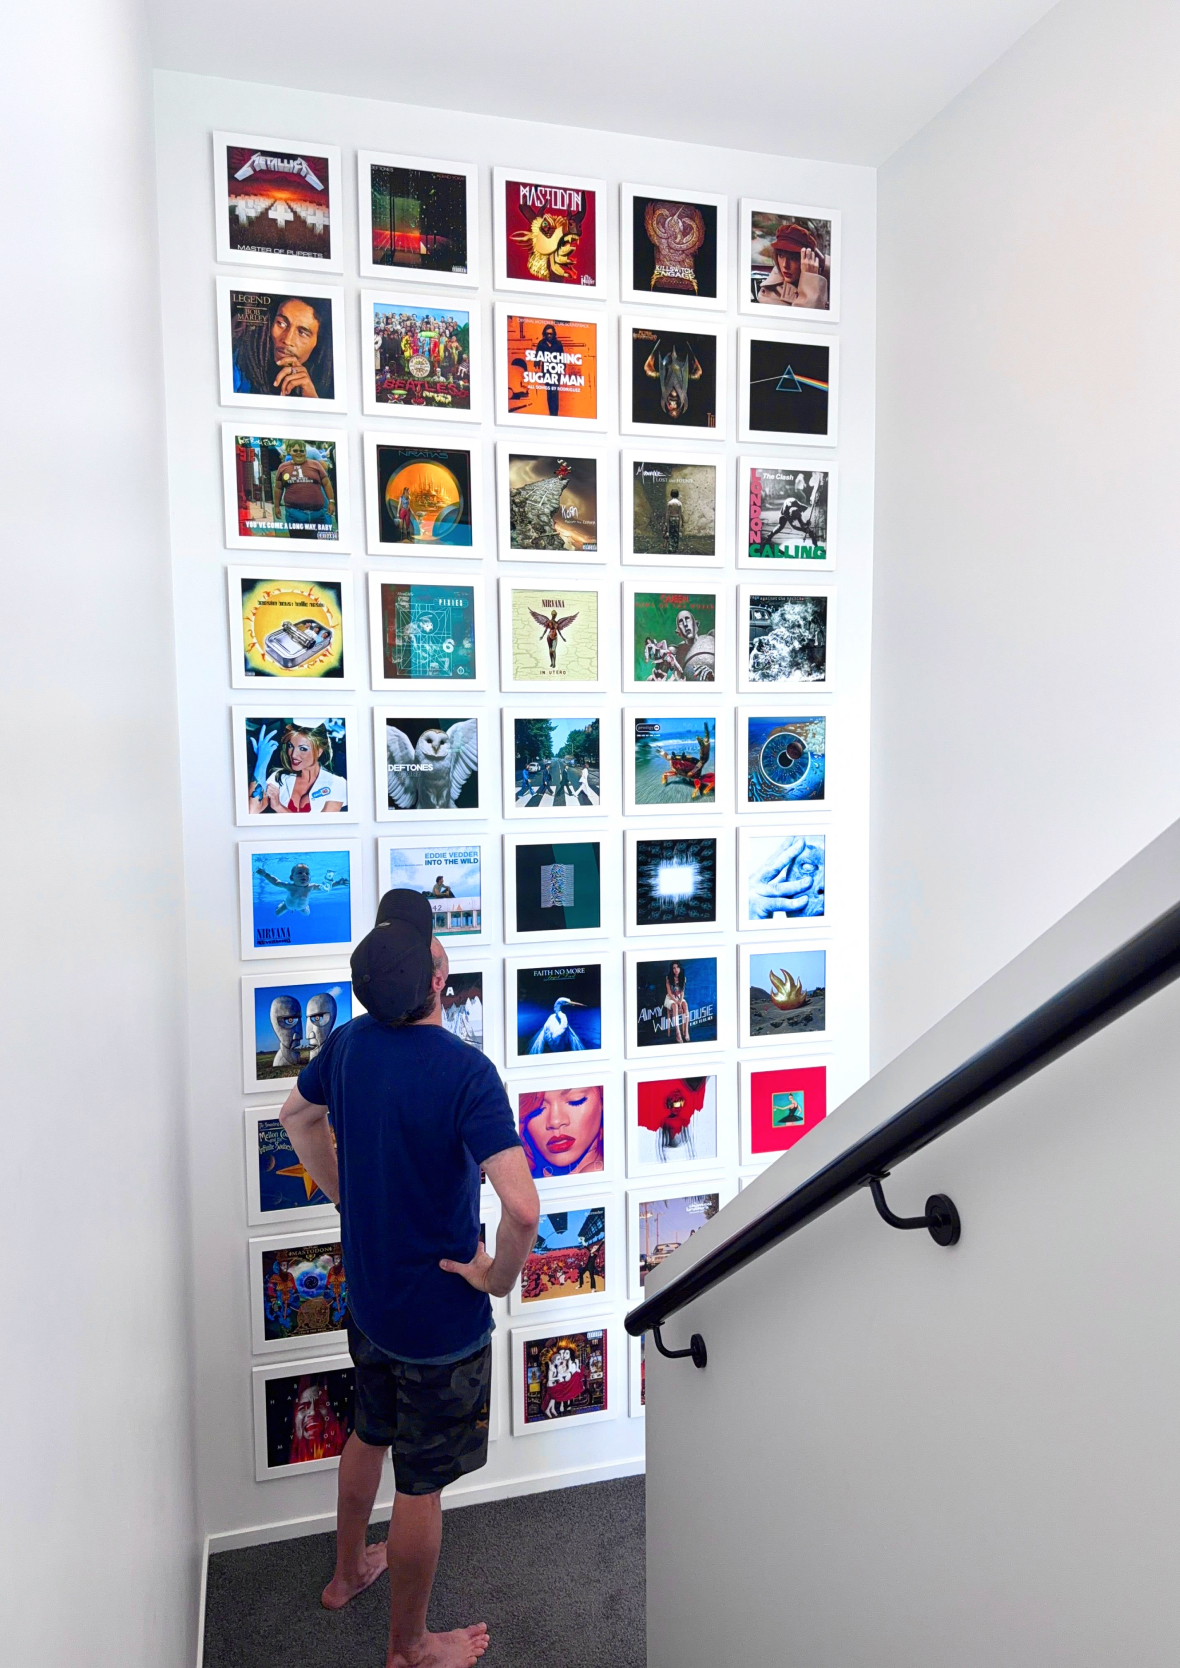
What I love most is that it changes how the space feels every day. You notice different albums, colours and details depending on where you’re standing or what angle you’re coming from. If I did it again, I’d still use the Honeycomb Hooks. I expected slightly more fine-tuning adjustment out of them, but once installed, nothing has moved. That’s exactly what I was looking for.
A year of planning, a year of ordering, two weekends on a ladder, and a wall full of album covers that still makes me stop on the stairs. Worth every minute of it.
I love that not every frame is visible and invites the person to explore.
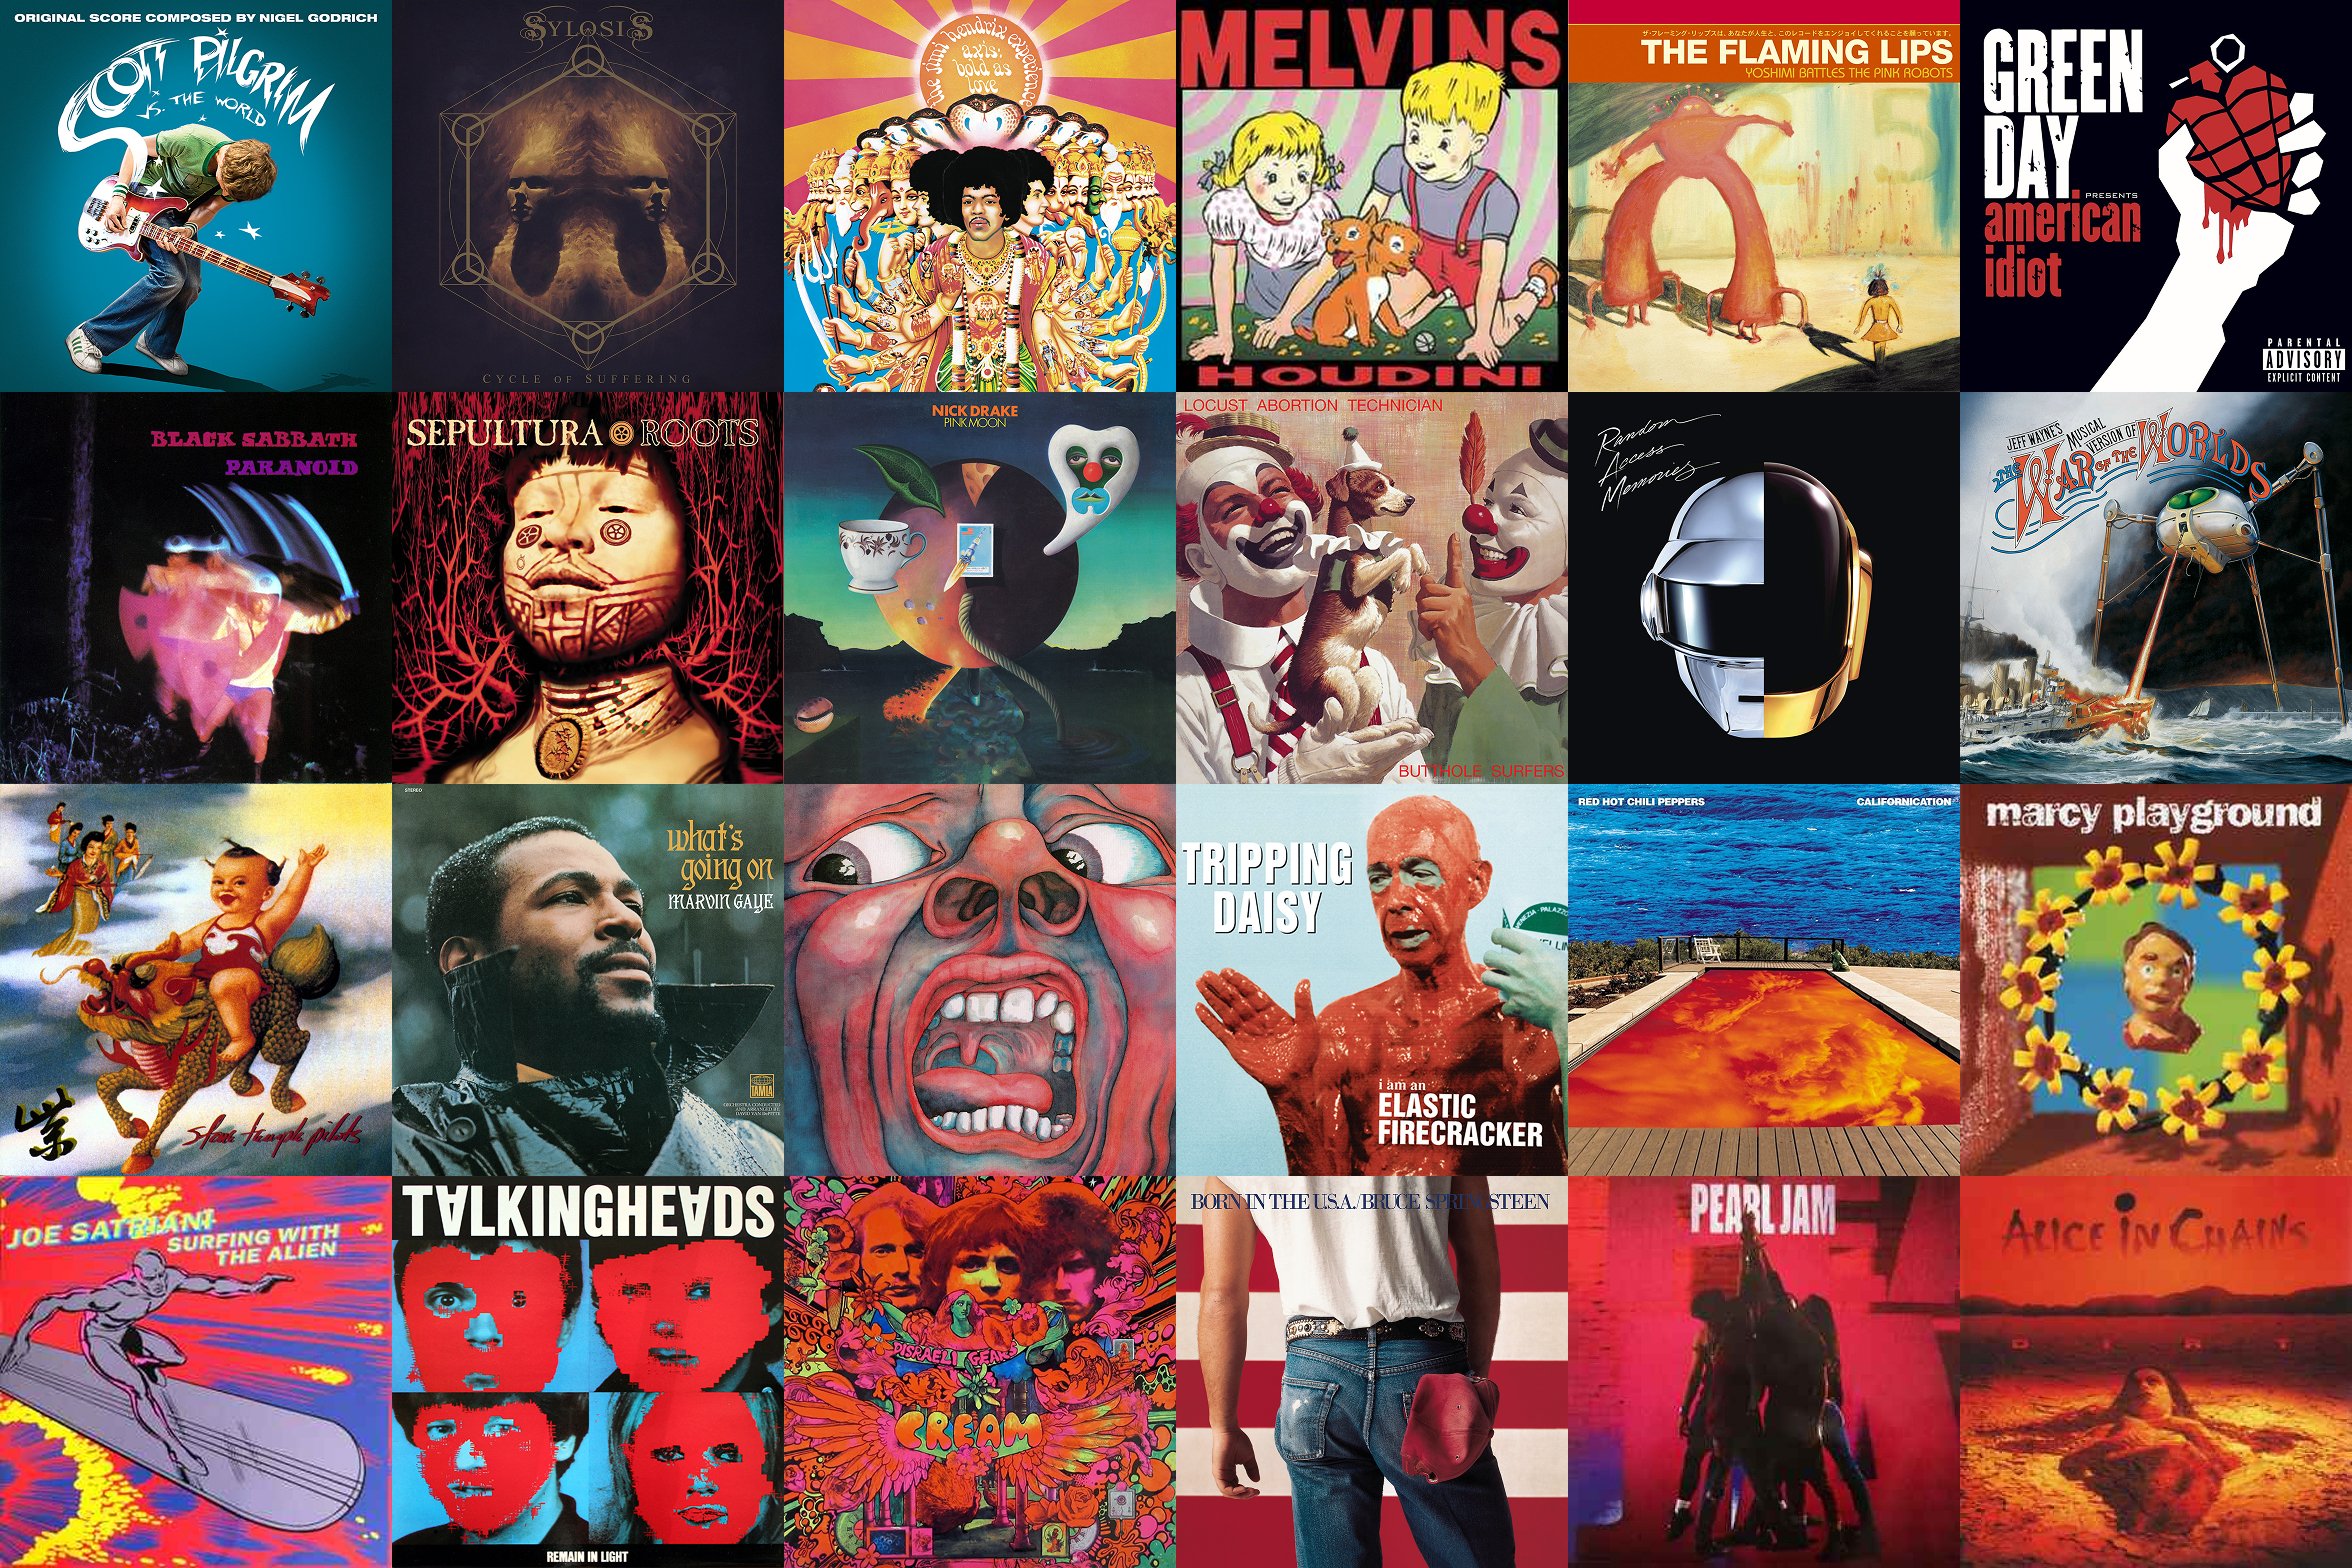
What albums missed out?
For the full list of every album that made the cut, along with the stories and design details behind each one, there’s a companion article featuring all 50 albums that made the wall, including a few honourable mentions that narrowly missed out.
The ones I would have loved to include, but sadly weren’t right for this project.